It’s been a few months since my last upate, after picking up this project in November 2011. In the last update I was assessed the state of the machine components I had been collecting and revisited the half-finished cabinet. I’m on the home straight, with much of the major construction work done already, I now need to assemble all of the elements of the MAME machine.
Rebuilding the Control Panel

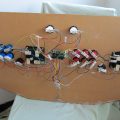
I thought that my control panel was complete after the last update, but after plugging into the Dell desktop I am using to host the MAME software, I found that the keyboard encoder was no longer working. This model used the old style PS2 keyboard interface, and I think the Dell was struggling with it under Windows XP, so I took the decision to replace with a new “Minipac” encoder from Ultimarc with a USB connector.
Unfortunately this required a different wiring loom to the one I had installed, requiring a trip to Maplins for a new PCB connector and a comprehensive rewire. In hindsight I probably should have replace the whole wiring loom as well, but I did get a cetain satisfaction from completing the rewire.
Attaching Control Panel to the Cabinet

With my shiny new Minipac in place, and the wiring complete, it was time to attach the control panel to the main cabinet. I had previous created a box to fit beneath the control panel to allow for easy access to the controls for maintenance, and also to store the keyboard and mouse which are needed (at least until I fit a decent MAME front end software) to operate the PC. I had cut a large hole in the back of the box which allowed the cables for the Minipac, the keyboard and the mouse to feed down to the PC in the main cabinet.
All seemed to fit together well, but I realised I still need to fit some kind of latch to hold the panel open for when I need to work on it (a hammer does just fine for now). I also need to fit the T-Moudling along the edge of the control panel, which I can do later as I have already routed the groove needed to hold the moulding in place. I haven’t routed the edge of the cabinet yet, which I may come to regret later as this is a messy job, but that’s a problem for another day.
Install MAME Software and Test

Before I could test with MAME, I needed to program the control panel to make sure all the buttons were mapped to the keyboard inputs correctly. Ultimarc provide a really good utility for this, and it’s also a good way of testing that all of the wiring to the Minipac has been effective. After mapping to my specific panel, and addressing some loose wires, the controls seemed to be working and registering key presses and joystick movements.
I had not downloaded the MAME software on this PC yet, so I needed to access the latest version from the MAME website. Not only did this give me a chance to try out the keyboard and mouse in place under the control panel, but also the cheap wireless card I had fitted to the PC, to save messing about with transferring files manually.
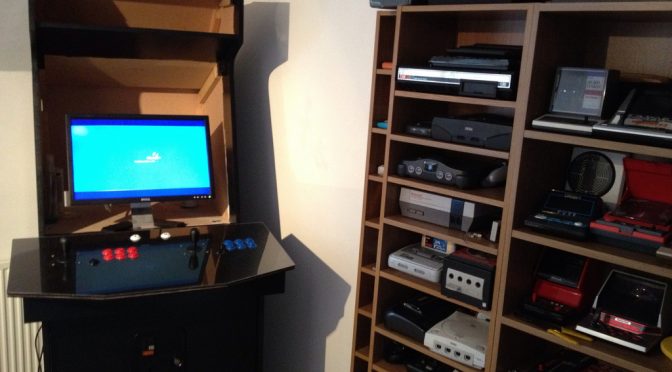
I soon had the MAME software working, and located a couple of ROMs to test the interface, starting with Phoenix (my all time favourite arcade game) and Snow Bros. After a bit of fiddling around under the keyboard to enter a credit (I don’t have the coin door working yet) I was ready to go!
After waiting so long (remember I started this project back in 2004) it was great to finally be using the cabinet, and it felt fantastic. The height and positioning of the controls seem perfect, and the feel of the joystick and buttons 100% authentic. At this stage it would be very tempting to just load up my favourite ROMs and start playing, but I have a few more jobs to do now and a renewed enthusiasm to complete the build.
Building the Coin Door

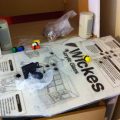
I had previously purchased a pair of coin doors from eBay, so these just needed to be tidied up with a bit of sandpaper, and some Hammerite added in places to address a bit of corrosion. The doors would be permanently embedded in the front panel, but not designed to open as I would be putting the whole of the front panel on a hinge to enable access to the machine’s interior.
After drawing around the front panel, I just had to cut out the wholes with a jigsaw, and prime and paint the panel with black latex paint. The doors were then attached along the original door hinges and locked closed in the panel. The doors look great and add a huge amount of authenticity to the otherwise plain machine, and I would recommend to anyone looking to undertake a MAME cabinet build.
Final Assembly

The cabinet itself needed a bit of a rub down and final coat of paint, as it had been moved around a lot in the last few years. I was pleased with the final paint finish, which was applied with a small sponge roller using plenty of paint, and looked just right – not too matt, not too shiny, and no brush strokes.
I fitted the recently completed front panel including coin doors using a piano hinge running down the left of the door, required due to the weight of the 16mm MDF. With the panel in place, all of the major contruction work was now complete and I could take some time to admire my handiwork (and maybe have a few rounds on Snow Bros.). I’m really pleased at how the cabinet has turned out, but realise I have few jobs to do before it is complete.
I’m also not convinced the monitor is big enough to really make the most of the space available, so I need to look into getting a bigger LCD monitor or TV, which is going to cost but I think will be worth it.
The other remaining jobs on my snagging list include:
Now I’ve got this far I suspect my next update is going to a lot sooner, the end is definitely in sight.
Jody, I say go for it, if you don’t start you cant finish it! Let me know if you need any advice on components and suppliers.