After years of retro games collecting I finally buy a pair of Atari 2600 consoles
Being an avid retro games collector with a minor case of OCD, I love nothing more than taking an old and unwanted console and bringing it back to life. The beauty of many of the old 80’s consoles is their construction – they were built from industrial strength materials, using plastics and sometimes metal that have stood the test of time. With very few moving parts and a very simple circuit board – I’m talking before the advent of CD-ROM – there was little to go wrong apart from worn out cartridge sockets and sticky switches. In many cases these consoles can be brought back to life with nothing more than some mild detergent and a bit of WD40.
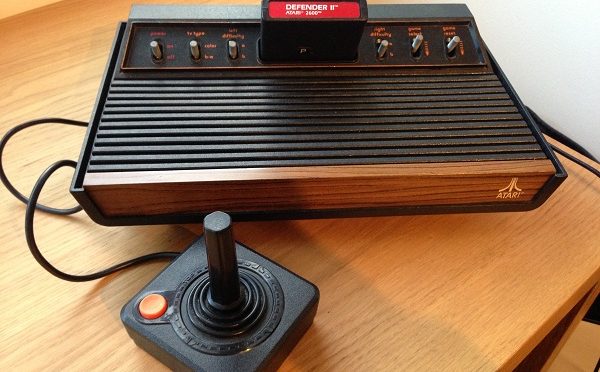
The Atari 2600 is a classic example of this, with it’s bomb-proof plastic case hiding a nothing but air and a small circuit board powered by a MOS 6507 processor.

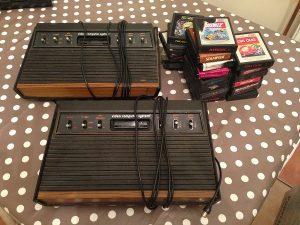
My latest acquisition was an untested pair of Atari 2600 “woody” variants, with the classic wood effect trim on the front of the machine, included with a bundle of games. I already have the all-black “Darth Vader” version of the console, but had been on the lookout for the woody version to complete my collection. I figured at least one of the two would work, and if I was lucky could sell one reconditioned and pay for the cost of the original purchase. In effect a free Atari 2600!
On picking up the games from the local eBay seller (and saving shipping fees) I investigated the two boxes as well as the game to understand just what I had bought – there are a few variations of the machines and I wanted to trace the serial numbers to understand their history. Fortunately, both machines seemed to be in very good, if dirty (hooray more cleaning) condition. One of the machines even had the reseller’s sticker on the rear indicating it was sold by Bakers of Clacton- on-Sea in Essex. I did check to see if by some miracle the shop still existed but it is no longer there.
Using the references available online from the AtariAge website, it appears that both are the CX2600 model, produced in Hong Kong from 1978 to 1980, as opposed to the original Sunnyvale model which was slightly heavier and produced in the US. They retain the 6 switches on the front of the unit, as well as the lovely wood panelling – a feature which I think Sony and Microsoft should bring back for the next generation of console hardware.
After a wonderful evening of polishing and dusting, the consoles have both cleaned up a treat, and look almost as good as when they rolled off the line 35 years ago in Honk Kong – the only visible signs of wear and tear being the worn orange pinstripe running around the switches. The worst part (or best depending on your personal levels of OCD) is the long plastic grooves on the top of the machine that need a good going over with cotton buds in order to scrape out 30 years of dust and grime.

The next step is to plug them in and see if they still work, as well as checking out the big bag of cartridges which are in various states of disrepair, but hoping there might be some rare gem in there that I have not uncovered before. I’m also thinking that I might try a video mod to allow connection via a component cable, so I can play on a modern TV.
I’m hoping that both work – I’ll post another update when I have located a power supply and controllers and can fire up these classic consoles.


