Category Archives: Projects

BAS Arcade Cabinet Restoration – Part 2

Arcade cabinet restoration – the fun stuff

With the major repair work completed on the woodwork, monitor and control panel (covered in part 1) it was time to focus on the cosmetic aspects of the restoration of this BAS Arcade Cabinet.

The cabinet itself was not in really bad shape, but the coin doors and metal trim had suffered from rust which was showing through the paint, and the lighting behind the marquee and coin slot was not working. There was also a very scruffy piece of rubber on the footrest of the cabinet which would need to be replaced. Finally I would need to replace the rubber t-molding which was removed when the cabinet was stripped for repair.

Stripping, Sanding and Painting

Starting with the metalwork, a lot of arcade restorers rely on the services of powder coating companies that will shot blast the old rust and paint away before apply a new powder coat. I decided on the DIY approach as I was interested in the quality of finish I could achieve myself, and if I was not satisfied there was nothing lost. I could always send off to the powder coaters to fix.

So I began the process of removing the metalwork, which was all conveniently bolted on. Off came the coin doors, metal edge trim and marquee retainers as well as all the various nuts and bolts which would also need to be treated.

Testing paint stripper
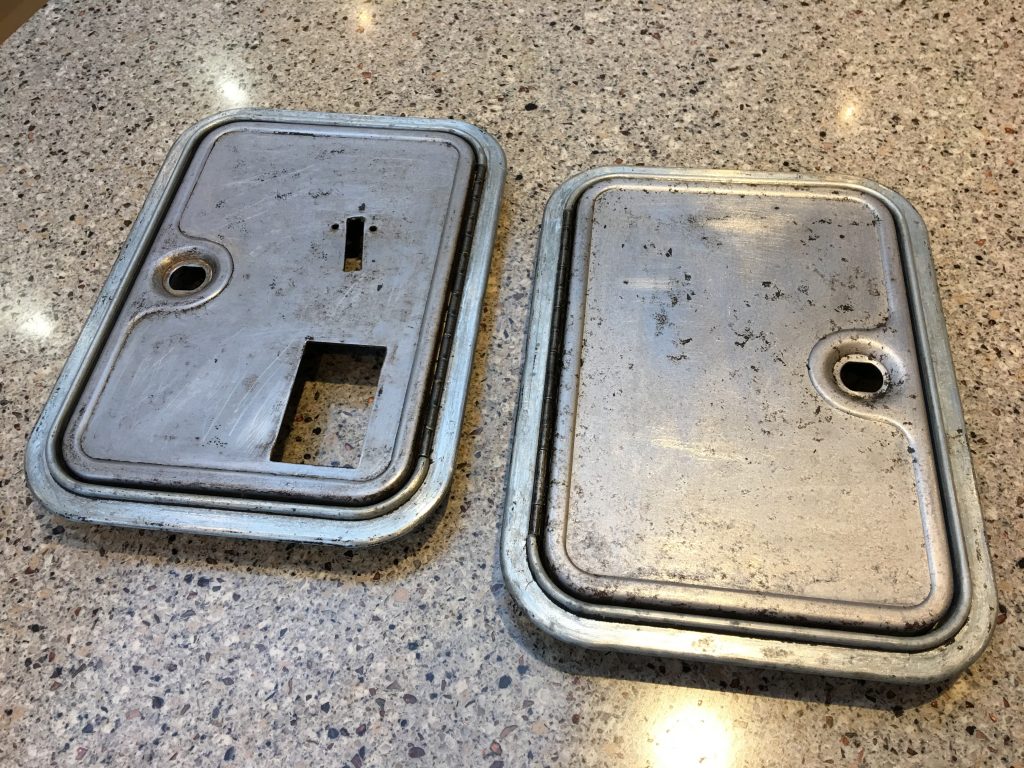
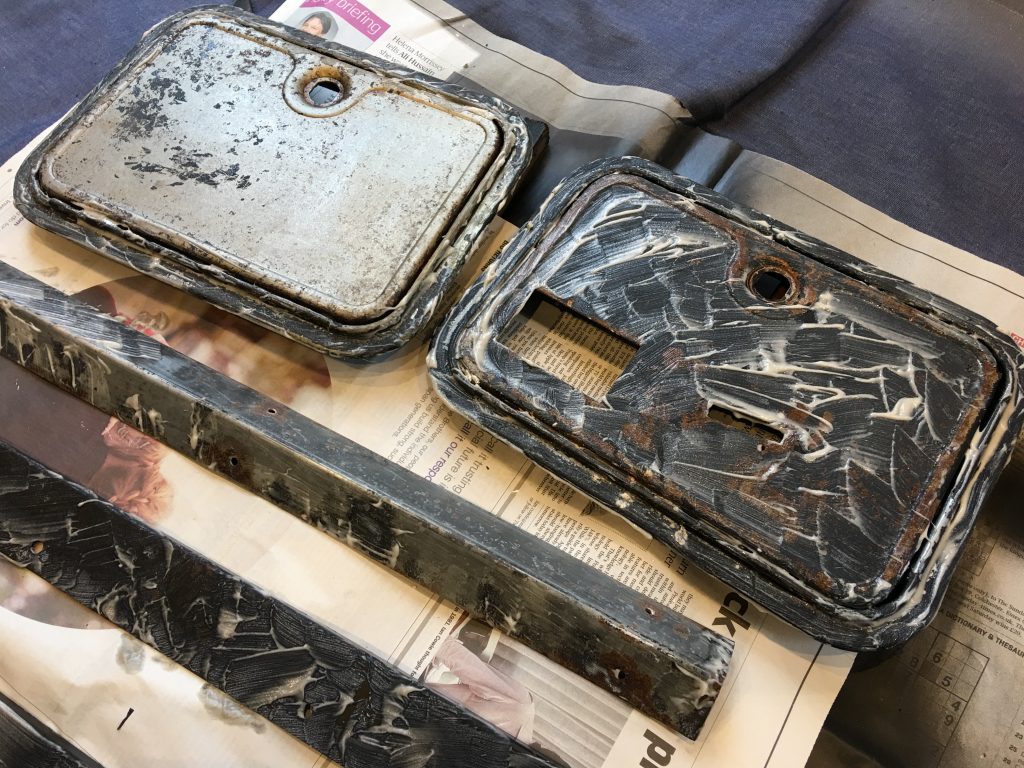
Testing the paint stripper on the rusted doors

My plan was to use a paint stripper to remove the worst of the paint chemically before sanding off the residue and using a rust converter if necessary before priming and painting. As you can see from this picture the stripper paste was very effective on the coin doors, albeit after some experimentation with thicknesses of paste and time left on the paintwork.

Pain stripper on the coin doors
Using paint stripper on the rusted coin doors
Coin doors stripped
Coin doors stripped and ready for sanding and primer

The metal trim pieces were a lot easier to treat than the coin doors as the paint was thinner and the surface nice and flat.

After a bit of sanding by hand to remove the rust I applied some rust converter fluid to make sure it wouldn’t bubble up again before preparing for primer. I decided to use PlastiCote as I had heard good things about this paint, and to use standard rattle cans for the best finish without special spray equipment.

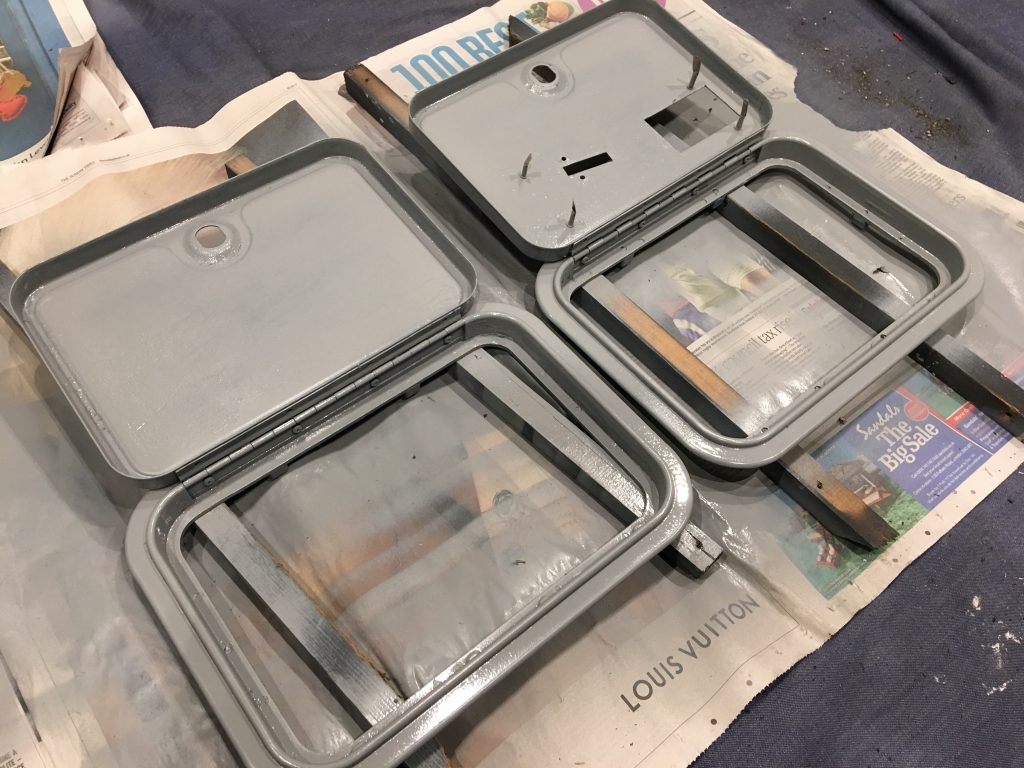
I took my time and applied the grey primer as per the instructions in light coats with a short drying period in between. After 24 hours I then sanded to remove any imperfections and give the paint a key for the black topcoat. I selected a satin paint that resembled the original, although some people prefer the crackle type finish you get with Hammerite.

Coin doors primed
Coin doors primed ready for top coat
Primed metalwork
Metalwork is primed ready for top coat

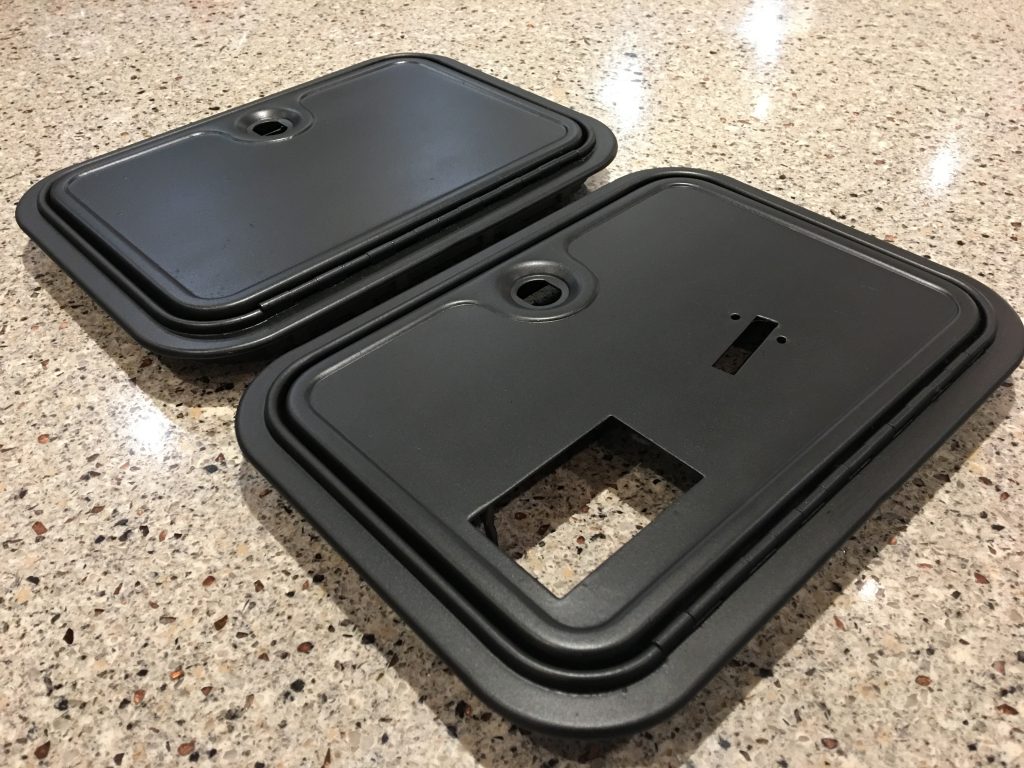
The paint went on smoothly and again I took my time with light coats, and a short drying period in between. At this point I could tell how the doors were going to come out and I was really pleased with the result. It’s not going to be as perfect or hard wearing as a powder coat but it was very satisfying, being my first attempt at metal finishing.

Coin doors painted
The coin doors finished in satin black
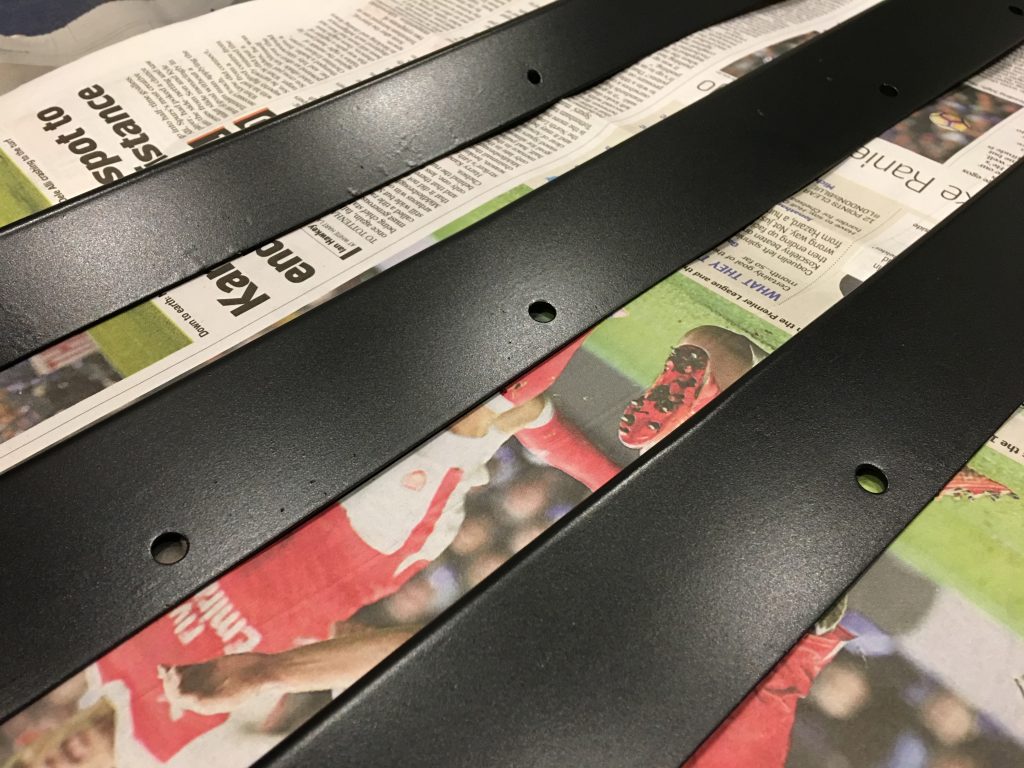
Metal satin black
Metal components with several coats of satin black

Fitting an LED Marquee Light

I set the freshly painted metalwork to one side to harden off a bit more while I focused on other jobs, the next fix being a new light for the marquee. The original marquee had a fluorescent tube, as did all arcade machines of the era, but I decided I wanted to use LEDs, as they are cheaper, last longer and generate less heat than an old tube. As they are not really visible anyway there is no argument to keep them, even for the purposes of authenticity, as an LED array can generate a similar lighting effect. I chose a pre-made 12V unit built for use as a caravan light, as it would be easy to hook up to a spare output from the existing transformer.

The LED unit fit nicely in the space vacated by the fluorescent tube, attached to an angle bracket with some vecro in case it needed adjustment to get the best marquee lighting effect. I need’nt have worried as the light looked great behind the marquee, which I reattached with the freshly painted retainers. I even treated myself to new black screws as they would be visible under the marquee. I kept the marquee original as it is such a great design, and I plan to use this cabinet as a multi-game unit so want to keep it generic.

LED marquee
The new LED marquee light fitted
testing marquee
Testing the new LED marquee light


Restoring the base of the cabinet

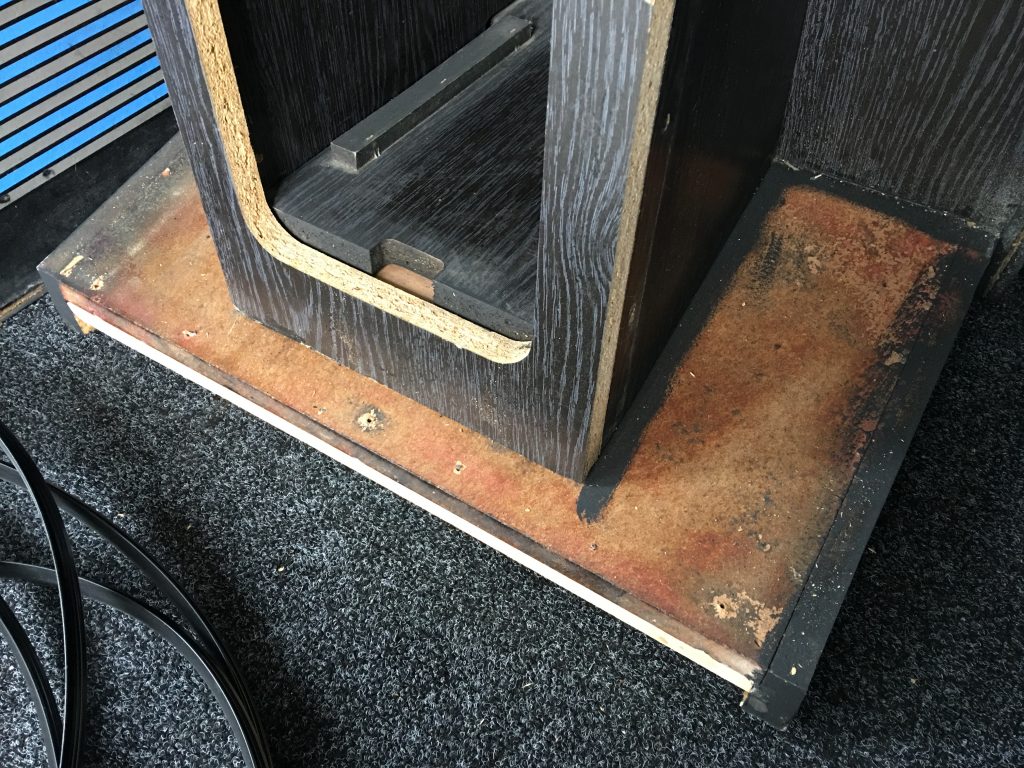
With the marquee in place I turned my attention to the base of the machine, and removed the tatty old rubber matting. I filled all the old screw holes and painted the edges with matt black paint in case any showed through the new matting and metal edge protectors. I then cut some new rubber matting (a bargain at £7 for a 2 meter roll including delivery) and fit it around the base. With the metal edge protectors fitted and new black screws the bottom of the machine looked as good as new.

The base of the BAS cabinet
The base of the cabinet stripped of old rubber mat

With the rubber mat replaced and coin doors test fitted the base of the cabinet looks as good as new.

Cabinet base complete
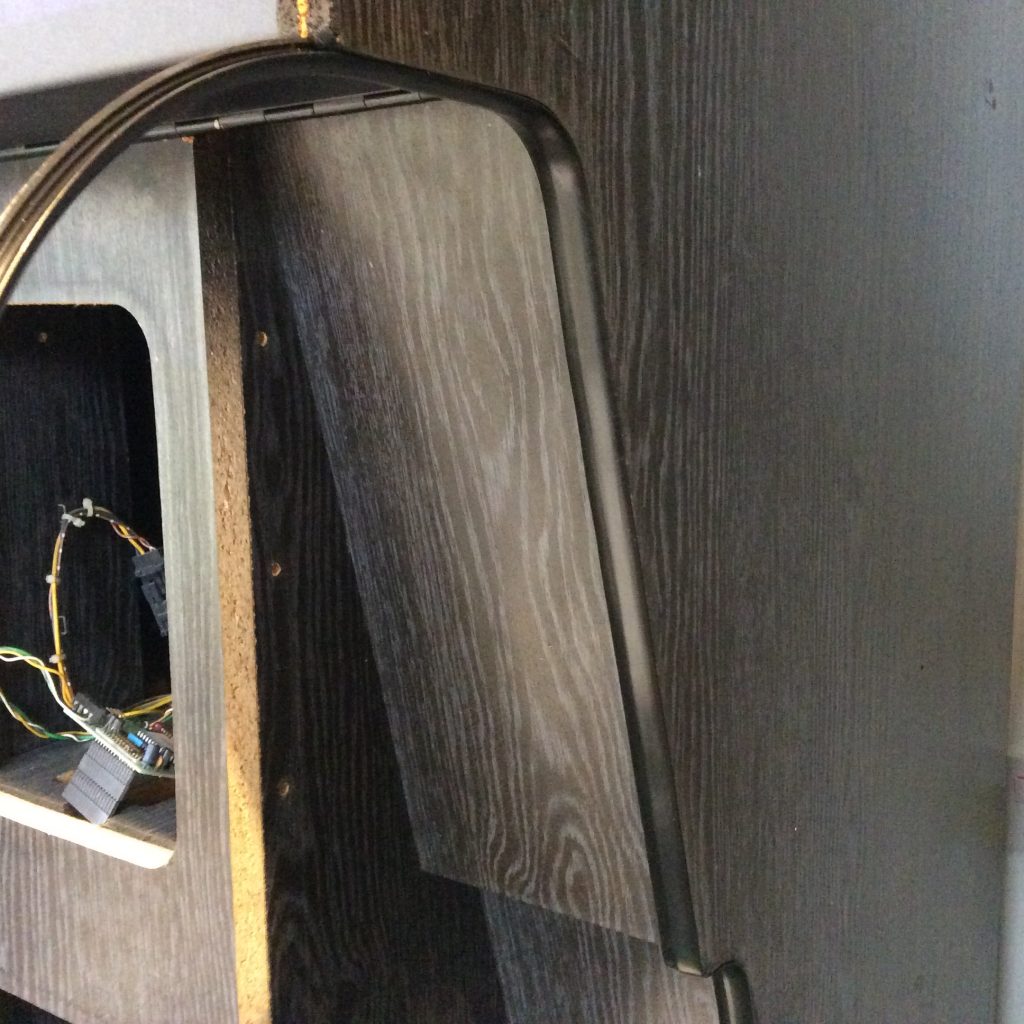
The cabinet base fitted with new matting and freshly painted metalworkOne of the easiest ways to cheaply and easily smarten up a tired arcade cabinet is to replace the t-molding which costs around a £1 per foot, and takes around 30 minutes a side to fit. Once the old t-Molding is removed with the help of a screwdriver blade, the new t-molding is just hammered gently in with a rubber mallet. For any corners, you just need to cut or nick the plastic to allow it to bend properly and for a tight fit.


T molding
Applying T Molding to the tricky corners
New t molding
Applying new t-molding to the BAS Cabinet

Finishing Touches

The final step was to fit the coin doors, which bolted back on easily and some new locks added, cheap as chips on eBay but make a huge difference to the look of the doors. As you can see the result is an “as new” set of coin doors for the cost of a couple of cans of paint and some elbow grease.

Finished coin door
The finished coin door reassembled with new locks

The final touch, which only came to light after I reattached the coin doors, was the lack of lighting behind the coin slot. A trip to Halfords later and I had a new bulb, a common item which is also used for car indicators so easy to source.

Coin door bulb
Coin door with indicator bulb from Halfords

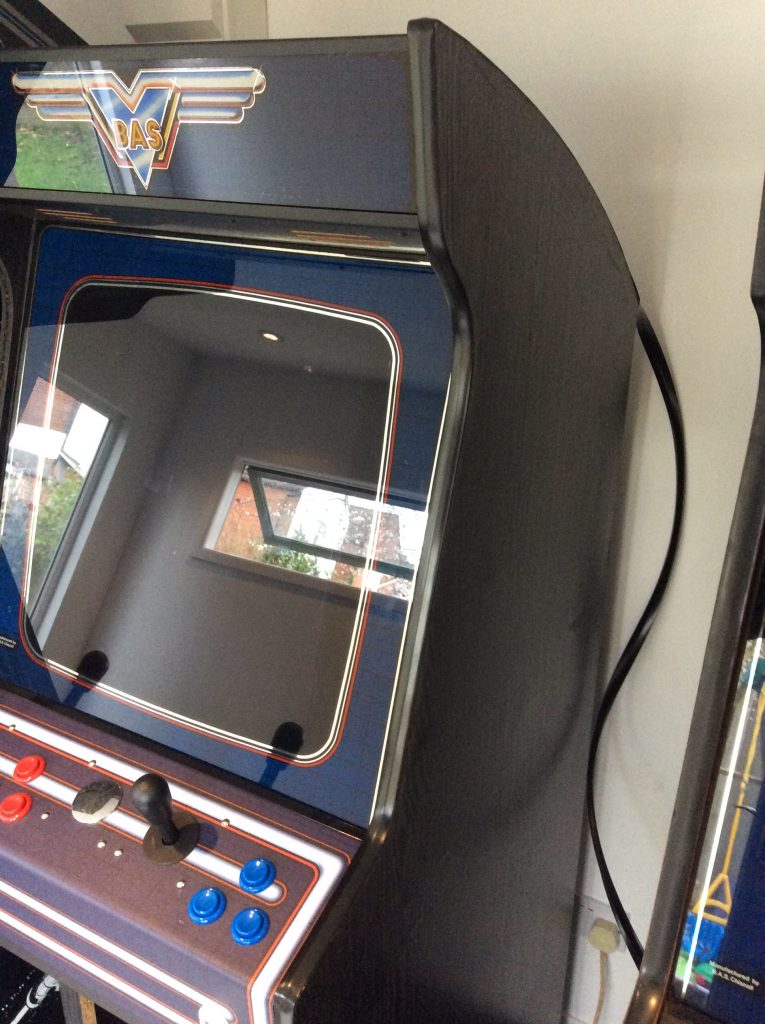
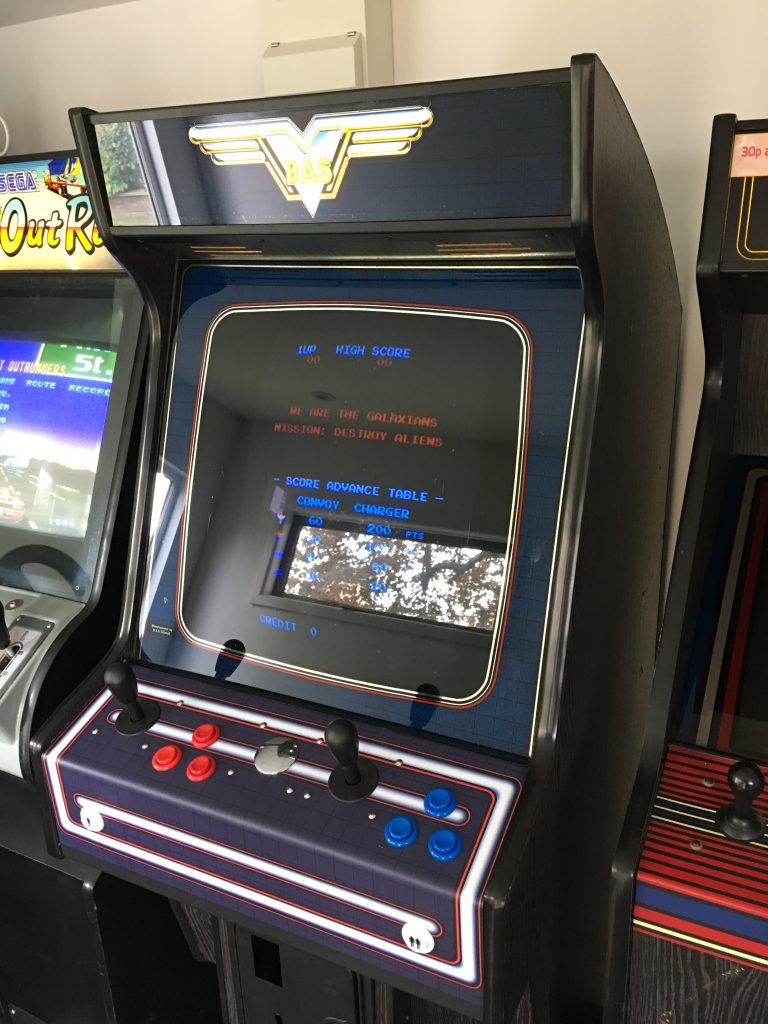
So that’s about it for this project, the BAS JAMMA cabinet is complete and ready for another 30 years of arcade gaming. This will be my “vertical” games cabinet, with a 60-in-1 board for now, while I develop a MAME based solution with access to more classic arcade games.

Now I’ve completed this restoration I much more confident I can tackle a dedicated arcade cabinet, and not make huge mess of an irreplaceable piece of gaming history.

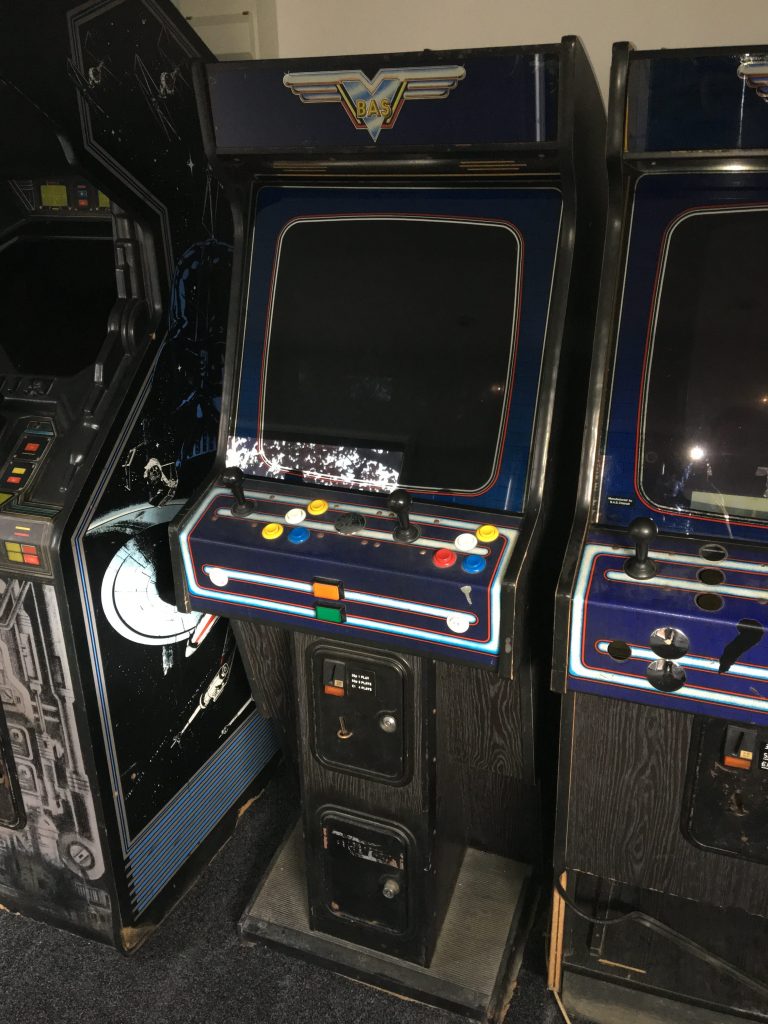
Finished BAS cabinet
The finished BAS cabinet

The Arcade Shed Build – Part 1

Why build an Arcade Shed?

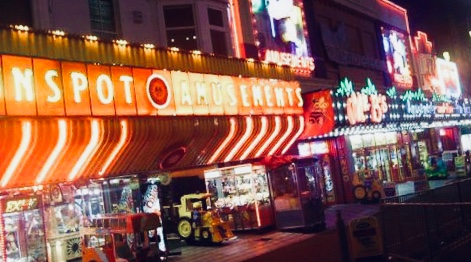
Growing up in Essex in the 80’s, I had easy access to some of the best arcades in the UK, with Southend being a 25 minute drive from my home in Grays.  Every Friday my friends and I would head up the A13 in an old Ford Capri owned by my friend Jason, and hit the arcades on the Southend sea-front. It seemed then that there were new arcade games every week, dedicated games that were almost impossible to replicate on the home consoles and computers of the time (although the BBC Micro did a good job).

Southend arcades
The arcades of Southend were where I spent most of the 80s

30 years later and the arcades are still there, but the games are all gone, replaced with 2p coin pushers and slot machines.  A few retro arcades have sprung up, most notably Arcade Club in Bury, and the Heart of Gaming in London. Southend even has its own retro gaming Mecca in the form of Astro City, which has some great retro cabinets.  But with a full time job in London and 4 kids I can’t head off to Manchester every time I want to experience an 80’s arcade.

Arcade Club
Cabinets in the Arcade Club in Bury www.arcadeclub.co.uk

So I decided to create the real thing in my garden, my own Arcade full of favourite 80’s games.  I’m calling it the Arcade Shed, as that’s what it’s going to be – a big shed.  It needs to be big enough to fit in my favourite games – at least 4 or 5, plus room for at least 1 pinball table.  It needs to be insulated and heated to protect the sensitive electronics from the cold and damp,  and just as importantly allow me to play all year round.

Arcade Shed : The Games

As far as the games are concerned, I had a shortlist although this was always going to be subject to change, I was warned by other collectors that you always end up with more than you planned, but these were my “must haves”.

On my shortlist I had:

  • Star Wars Arcade – Bought this one already, cost a fortune, currently with broken monitor and in need of a few cosmetic repairs
  • Track & Field – I’ve bought an Electrocoin Cabinet to house this game, and a dedicated control panel.  Just waiting for the PCB to come back from being repaired by a contact on ithe UKVAC forum.
  • Snow Bros – Have the PCB already and a BAS Jamma cabinet to house this in, just needs a bit of tidying up.  Played this to death at our grotty student union bar at Aston University.
  • Centuri Phoenix – Looking for a dedicated original cabinet for this, my favourite shooter and first arcade obsession
  • Outrun (Midi size) – The classic driving game, didn’t have this cabinet when I build the shed but have managed to find one since, and it’s is awesome!
  • MAME Cabinet – probably vertical format, to play all of the other games that I can’t fit in!  Will need a Jamma cabinet to house this, and I want to play on an original arcade monitor.  Not decided between a PC or a Raspberry Pi, or a 60 in 1 board
  • Pinball – Addams Family, my absolute favourite and also will be another really expensive purchase
  • 2p count pusher – will be essential in making the arcade family friendly, the kids and wife just love these games. Very expensive as still used in arcades and making money for the operators
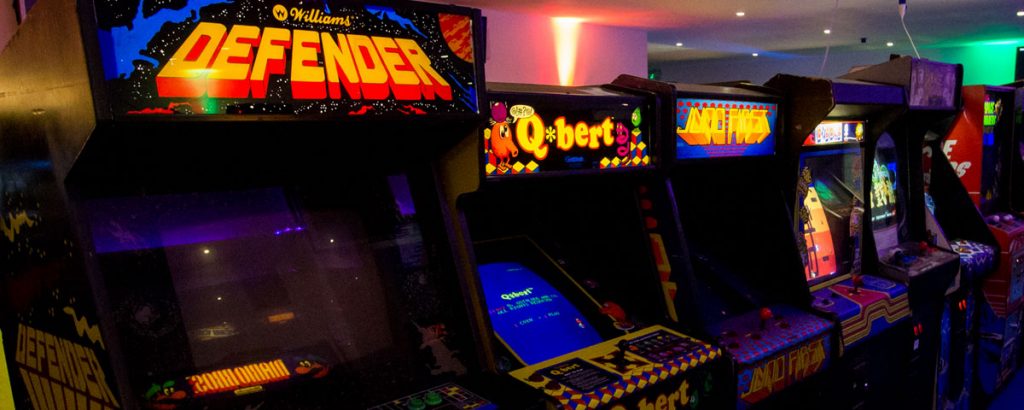
Dream arcade lineup
Some of the arcade cabinets in my dream lineup

That’s quite a long list with some rare and sought after cabinets in it but I’m not expecting to have my arcade complete overnight, this is going to be a long term project.

Building the Arcade Shed

After a lot of internet searching, and considering the potential lifespan of the arcade shed, I settled on an actual shed which I would restrospectively insulate to turn into more of a permanent structure, as opposed to a pre-fabricated garden building.  I estimated that a garden room was going to cost me around £10k for the size I was looking for, whereas a heavily modified shed would cost me half as much – albeit with a bit more work involved.

The building would need to house the gardening equipment such as spades and mowers, as my shed would be replacing an exiting smaller structure, so I went for a combo deisgn that had an integrated “shed-in-a-shed” with a separate door.  After pacing out the space at the bottom of my smallish town garden, I worked out I could have 17 foot by 10 foot structure, with a Pent design that was taller at the front to allow my arcade games to be pushed against the back wall.  I would have minimal windows to allow for better insulation, and also to recreate the arcade feel and not have too many reflections on the screens.  After a trip to the local garden centre I ordered the bespoke shed, which would come with optional insulated floor and ceiling, double glazed windows and doors, and an updated rubber roof.

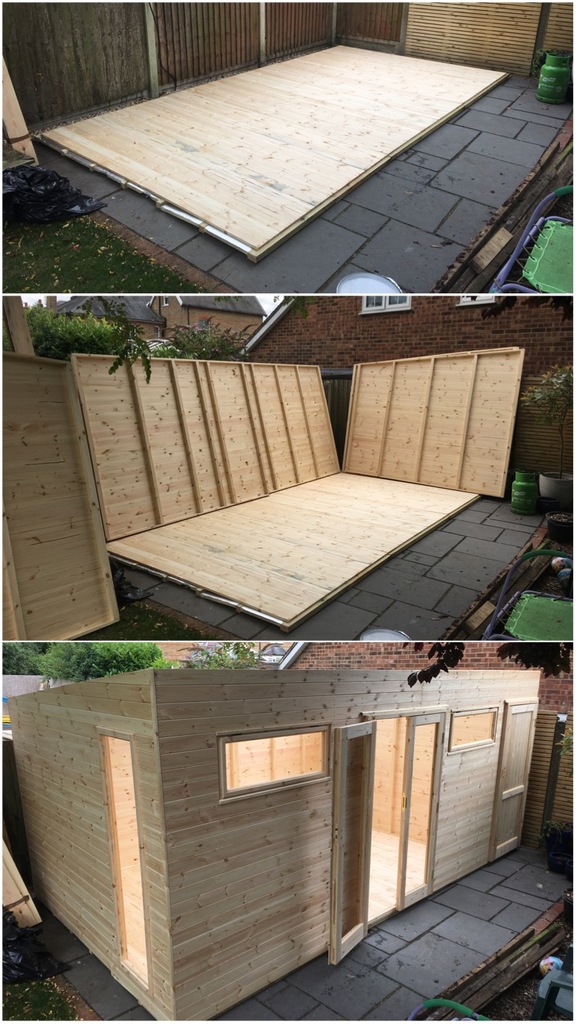
Arcade Shed Build
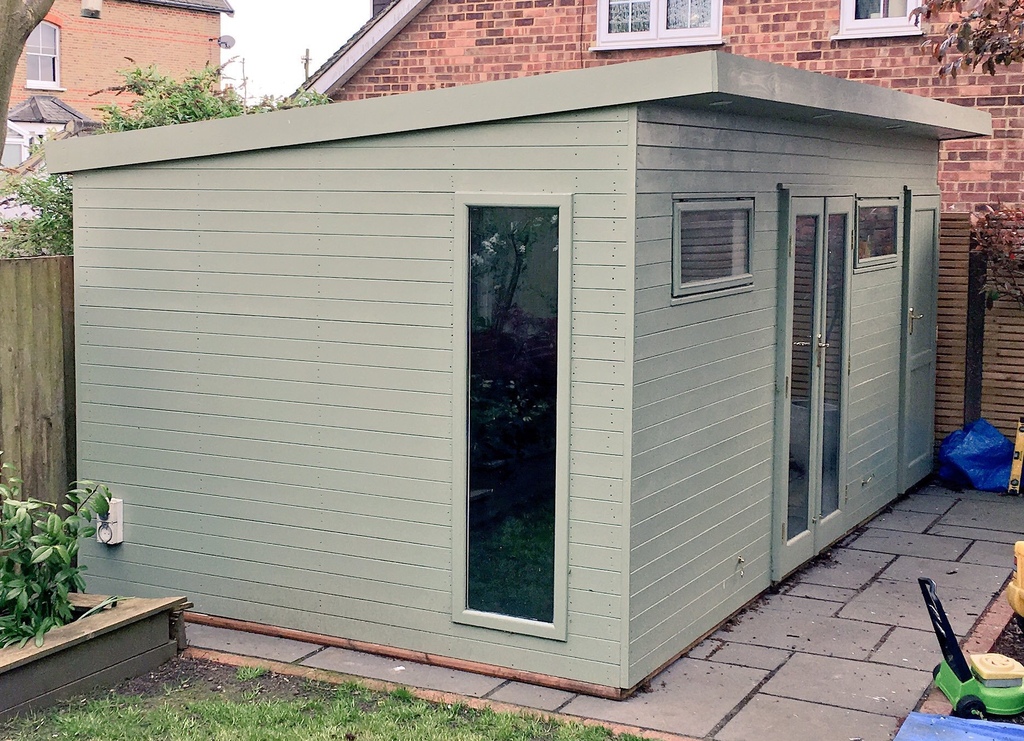
The Arcade Shed takes shape

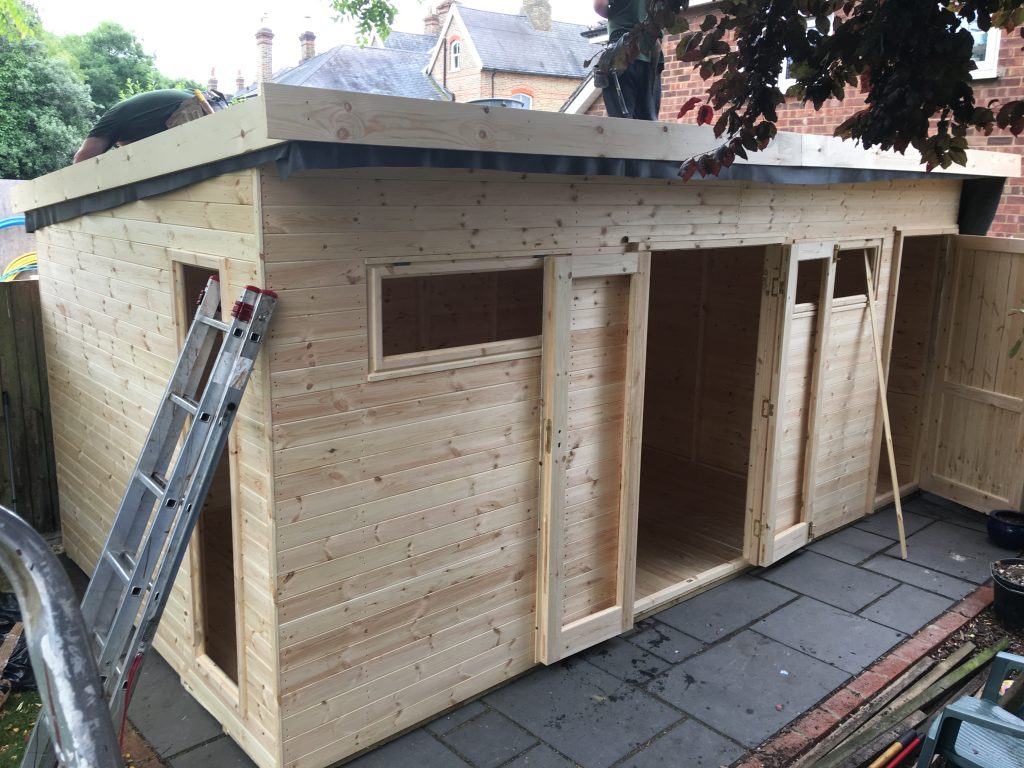
After an agonising 8 week wait for my shed to be fabricated, and a frantic last minute demolition and sales of the old structure, the arcade shed arrived, and was carried to the back of the garden in panels.  I was reassured by the grunts and groans of the shed builders, who complaining about the weight of these extra height insulated panels.  I thought the roof sections would never get around the back of the house, they were so big.

Just and hour later and the shed was fully constructed and ready to move in!

The Arcade Shed before painting

Arcade Shed Interior

Having waited 8 weeks for my shed to arrive I wasn’t going to hang about waiting for it to be completed, so i got working on the outside straight away. My experience with sheds was that painting them made them last a lot longer and was greater protection against the elements, so I had the shed delivered untreated, and quickly painted the whole thing with primer.

Arcade Shed painted
The Arcade Shed Freshly Painted

My summer holiday wasn’t going to stop progress, so I booked a local decorator to paint the shed with exterior emulsion while I was away and booked both a sparky and a builder to fit out the interior. While I am fairly handy and could have done this all myself, I am aware of my time limitations with a busy job and 4 kids, so elected to employ professionals.

Arcade Shed awaits plastere
Arcade Shed cabling complete ready for the plasterer

The builder put in celotex insulation panels in the walls followed by a sheet of plywood lining, which he then left for the sparky to fit the electrics – a consumer panel and a truck load of plug sockets as well as dimmanle led ceiling lights and external lamps. Then the plasterboard went in, and the electric sockets completed. I also elected to have a further sheet of plywood put over the floor, to help distribute the weight of the arcade machines.

Arcade Shed view
View up the garden to the house from inside the Arcade Shed

I procrastinated on the floor covering, with many people advocating wooden floors for ease of movement of the cabinets, and other suggesting carpet was the only way to go. In the end I settled on industrial carpet tiles, which would be easy to lay myself and also allow me to replace any damaged by 200kg arcade machines being constantly dragged over them. The carpet tiles went in with minimal effort, and I am very pleased with the result, very hardwearing and don’t seem to mind the beating they are subjected to.

Arcade Shed interior
Plasterboard up and lights installed

As soon as I had the carpet in, I moved in my collection of cabinets, such as it was at the time, and thankfully they fit nicely in the space, and the carpet seemed very happy having these huge bits of wood dragged across them.  There was just enough space at the back of shed for the tallest of my arcade cabinets, which meant I could use the whole of the back wall and fit in maybe 6 or 7 in total.

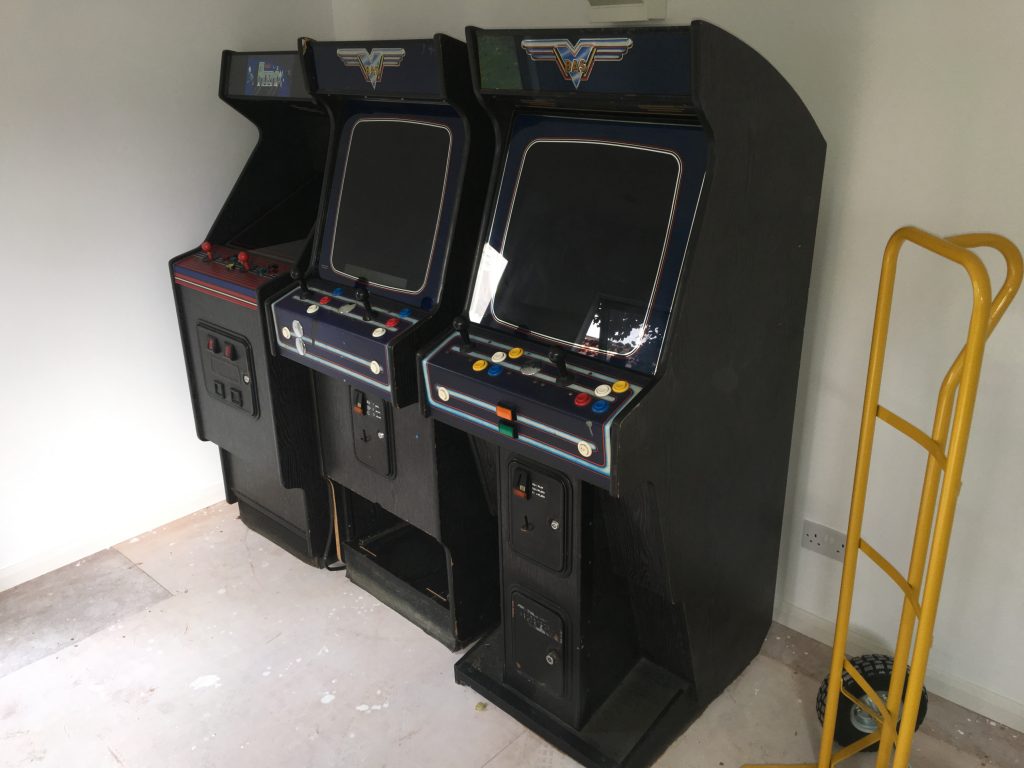
The Arcade Shed with carpet tiles fitted and cabinets moved in

So I have a completed arcade shed, painted, insulated and ready to use. In part 2 I will be looking at the games themselves, and how my collection has changed since the shed was first built. I hope this has inspired you to consider your own build, if you have any questions contact me via Twitter @retrogamesnow.

Cheers!

BAS Arcade Cabinet Restoration

After I built my arcade shed, I went on a bit of a buying spree, snapping up knackered old cabinets on eBay without much thought as to what I would do with them. I just knew that I had a space that needed filling with cabinets, and that I needed to learn how to restore them. I didn’t want to be just a player of old arcade games, I wanted to learn what made them tick and how to bring them back to life.  The BAS arcade cabinet was my first.

My initial purchase was a semi-working machine with a bootleg Mortal Kombat installed, this lovely old BAS branded cabinet, manufactured in the UK. I had seen a few of these knocking about on the UK forums, so I figured there would be enough people around that knew how they worked. Plus there might even be some spares available if I needed them. I managed to pick up this particular example for less than £100, a real bargain for an largely unmolested machine with what appeared to be a working monitor and PCB.

Martin the Van Man (UK king of arcade removals) delivered my BAS Arcade Cabinet along with a couple of others that I had managed to buy within a 2 week period. My first challenge was how to get them out of my hallway and down the garden before my wife came home.

Original eBay listing, and delivery day

Cunningly I managed to buy 2 virtually identical BAS cabinets, thinking that I might be able to make one perfect machine from parts salvaged from both, should it come to it. I also managed to acquire another Electrocoin Midi, a great little cabinet that may or may not include my favourite game, Phoenix. But that’s another story.

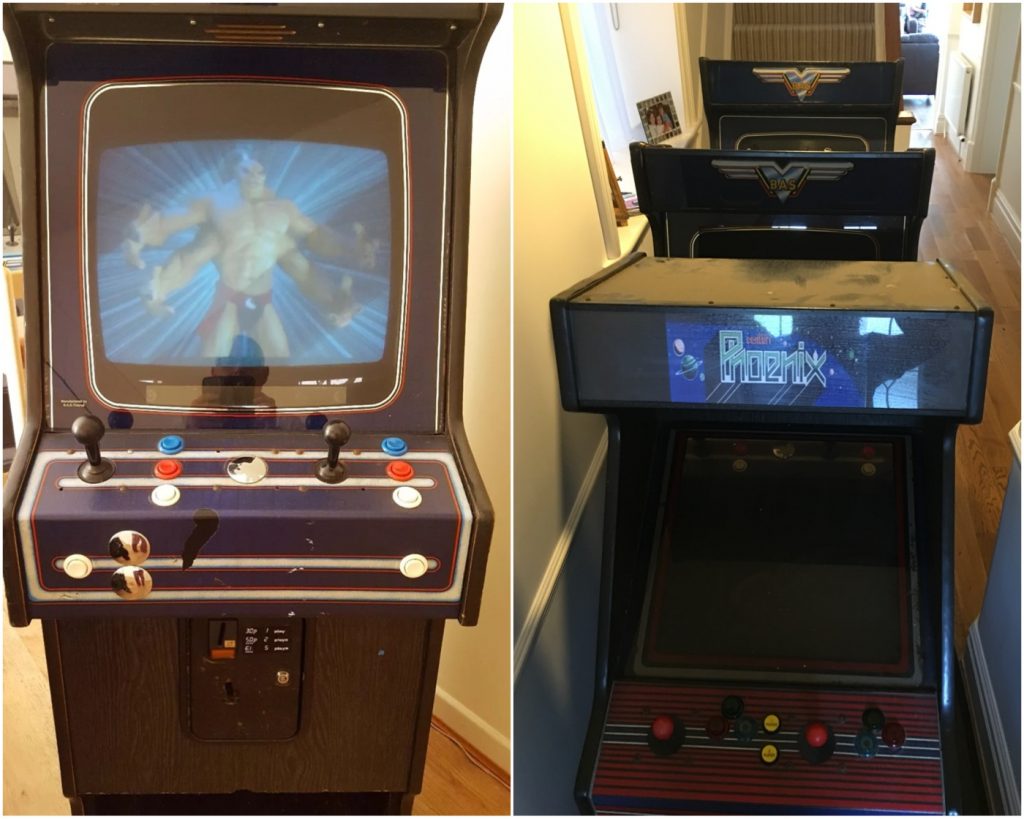
The 2 BAS cabs and the Electrocoin Midi make it down the garden to the arcade shed

Safely installed in the shed, my first job was to survey both the BAS cabinets and work out which one I was going to tackle first, and the problems I would need to address. I decided that I liked the look of my donor cabinet the best, as it was actually in better physical condition than the Mortal Kombat cabinet, albeit with an untested monitor and a botched control panel.

So my to-do list became:

  • Install a multi-game PCB
  • Test and fix the monitor
  • Repair or replace the control panel, joystick and buttons
  • Fix the damaged wood on the base
  • Remove all the metalwork and respray
  • Replace the rubber matting on the footrest
  • Replace the coin door locks (missing keys)
  • Find a replacement marquee light

This was going to take some time, but I was looking forward to a project that would give me experience of every aspect of restoration, not just the cosmetics but the electronics that power these old games.

BAS Arcade Cabinet Awaiting Restore
The BAS donor cab awaiting restore

Fixing the BAS Arcade Monitor

The cathode ray tube is the heart of these old machines, something that can’t be replicated with modern flat screens, and I was determined to keep this original monitor in place.  The other BAS machine had a working monitor but I wanted to find out what it would take to bring one back to life.

First job was to test the power supply, which was producing healthy voltages to both the JAMMA connector for the game PCB, coin door and control panel (5V) and to the marquee light (12V) according to my multimeter.  I had a working 60-in-1 game plugged in with flashing LEDs so I knew there was nothing wrong with the video signal being produced to the monitor.   The monitor was however showing no signs of life, and no “glow” in the neck, so I decided that the chassis would need to be removed and repaired.

This provided me with an opportunity to test out my new HV Probe, as the tube needed to be discharged before safely handling the monitor chassis due to the high voltages that can be retained by old CRTs. After donning my wellies and pink Marigolds (not joking), and with one hand behind my back to prevent my body becoming part of a circuit, I gently placed the probe under the anode cap.  Nothing.  No spark, no crackle of discharge, nothing.

Comfortable that I wasn’t going to kill myself, I removed the chassis from the monitor, making sure I took pictures of all the connections so I would be able to reverse the procedure later.

Hantarex monitor chassis
The poorly monitor chassis looking a bit worse for wear

I didn’t really know where to start with the repair of the chassis, so I cleaned it up with some cotton buds and some isopropyl alcohol, and sent it off to a contact on the UKVAC forum. Repairs to my Star Wars arcade machine have susbsequently taught me a lot about monitors, but at this stage I didn’t have the equipment or know-how. So I figured while the monitor chassis was being repaired I could focus on the cabinet itself.

Control Panel Repairs

The control panel on both BAS cabinets were less than ideal, one with a standard but weird vertical button arrangement, the other with extra buttons hacked on, presumably to play Mortal Kombat. Asking around the forums I found someone with a spare BAS panel, one with a button configuration that I was happy with.

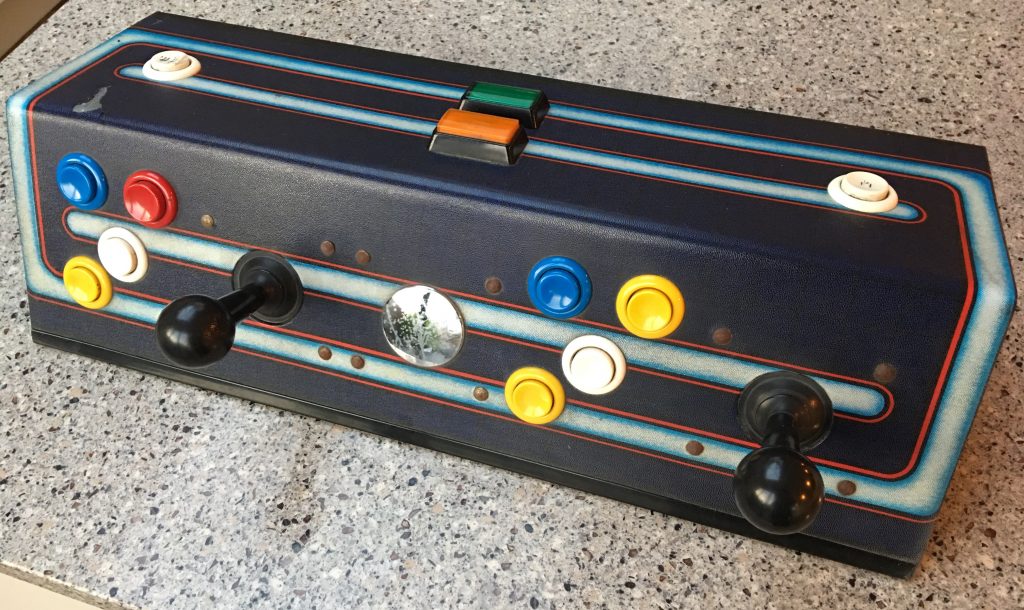
BAS Control panel
Original BAS Control Panel with strange button layout

The control panel overlay had seen better days, so I decided that I would need to repair or replace it. Back to the forums, and although there was no off-the-shelf replacement available in the original design, I found a chap who was prepared to make a copy.

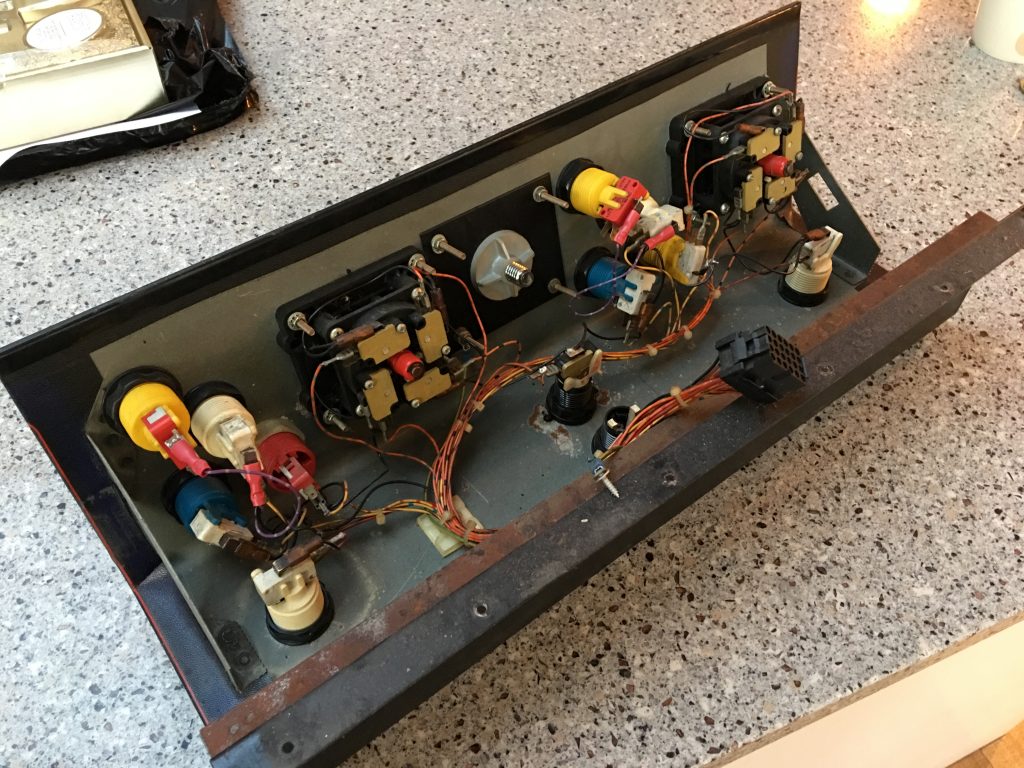
The wiring harness in the control panel was however complete and had a molex connector for easy replacement, so I documented the wiring layout taking lots of pictures, and set about carefully removing the old buttons and joysticks. The joysticks were mismatched and a bit worn, so I planned to replace with some stock 8-way items that had left over from a previous MAME cabinet project along with some shiny new buttons. The blanking plate that covered the extra joystick hole would be salvaged and cleaned up with some Brasso in leiu of specialist plastic polish.

BAs Control Panel Wiring
The wiring of the existing control panel before removing buttons and joysticks

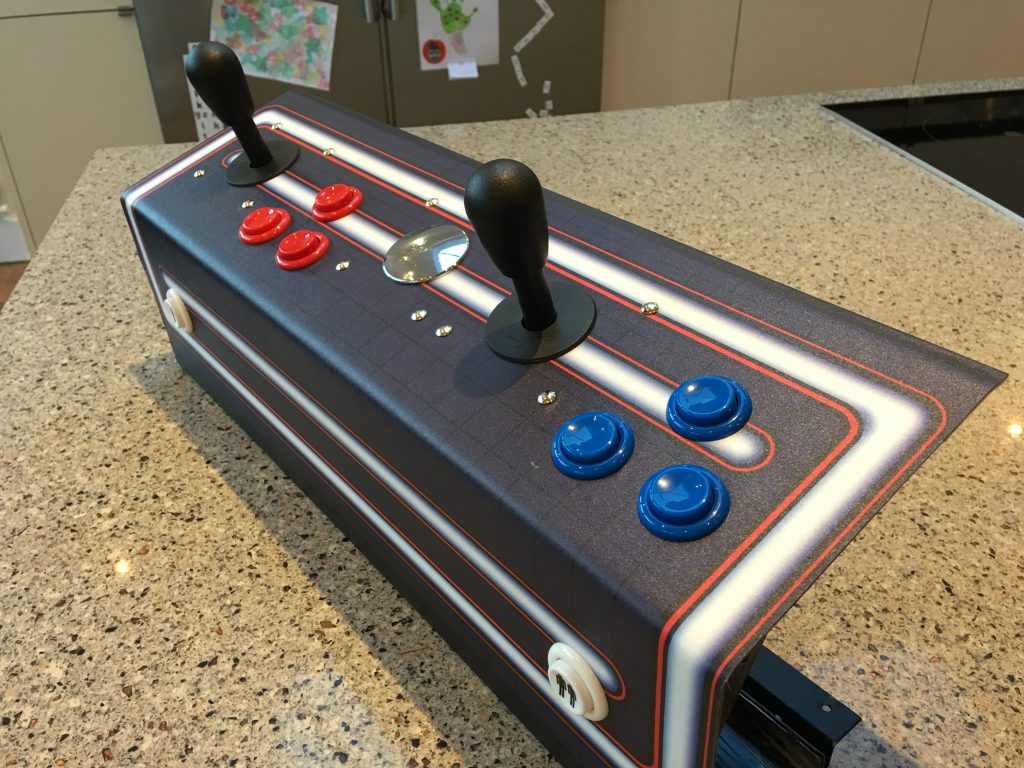
A few weeks later and my replacement panel overlay arrived (thanks Olly from the Arcade Art Shop) looking fantastic. I treated the replacement control panel with some rust converter to tidy up any corrosion on the bare metal, and gave it a good wipe down with white spirit to remove any remaining adhesive residue and dirt that would prevent the new overlay from sticking. I then carefully applied the overlay, making sure I smoothed it down as I went and lining it up with the visible area of the control panel. Once applied, I then cut out the joystick and button holes with a craft knife, leaving some overlapping triangular sections to tuck into the hole.

BAS Control Panel
Applying the repro control panel overlay

Then the most satisfying part, pushing the buttons and the joysticks through the newly covered panel and securing with plastic nuts and shiny new chrome bolts. I was really pleased with the result, basically a good as new finish with every visible surface and component replaced, while keeping all the original internals. Now the control panel was perfect, I needed to address some of the problems with the cabinet itself.

Completed BAS Control Panel
The replacement control panel with repro overlay, new joysticks and buttons

Repairing the BAS Arcade Cabinet Woodwork

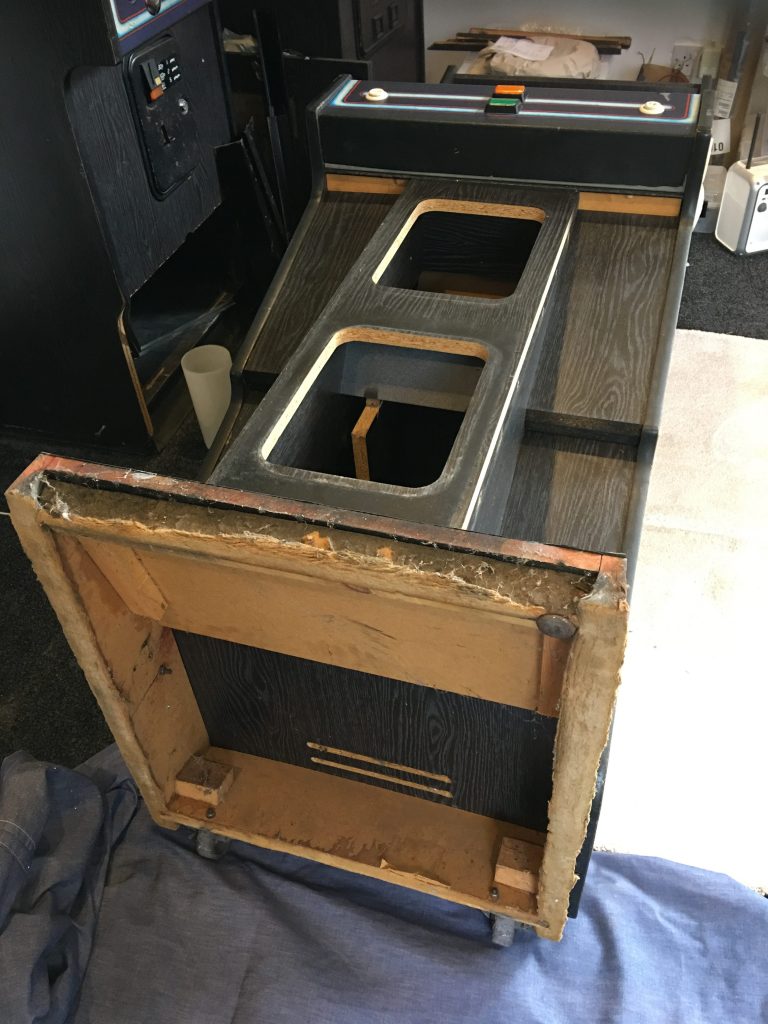
I had noticed when moving the cabinet around that there was some bulging in the cabinet edges, mainly in the bottom part of the cabin where the wood had possibly got damp and the glue holding the fibreboard together had decayed. So I tipped the cabinet onto its back (making sure the monitor and glass was secured correctly) to survey the damage.

BAS Cabinet with damaged wood base
The base of the cabinet before the damaged wood is repaired

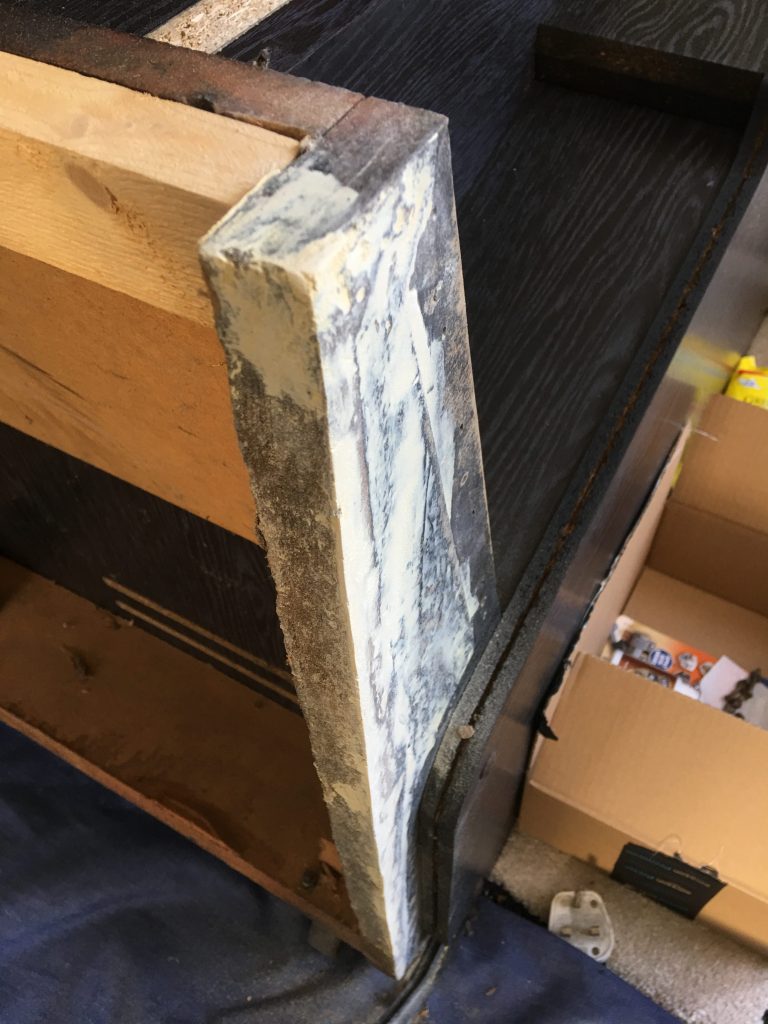
Looking at the bottom it was fairly sound, but would need some work to stabilise the spread in the board and prevent further damage, as well as improving the looks. I removed the loose material with a file and then applied a wood hardener to the remaining surfaces to “glue” what was left together, with the help of some clamps to push the spread wood back into place. After drying, I sanded away any remaining protruding wood, and then filled with a high performance wood filler to level the surfaces and fill any holes. After a couple of rounds of filling and sanding I was happy enough with the base to prime and paint Matt black. As most of the base is hidden with rubber mat or metal plate, it didn’t have to be perfect, just tidy.

Repaired base of BAS arcade cabinet
Based hardened, filled and sanded ready for painting

While I had the cabinet on its back I took the opportunity to remove the t-molding and all the remaining metalwork including the coin doors so they could be treated for rust and cosmetic damage. There was a lot of visible rust and bubbling of paint so I decided to take back to bare metal rather just touching up. This is a job that many arcade restorers like to outsource, by sending the components off to a sandblaster and powder-coater for treatment, but I wanted to get my hands dirty on this first project. Which will be the subject of my next update, as this one is getting a bit long!

But before I finish this update, I thought I would share the most exciting part of the build, as at this stage in the restoration I received an important package.  The monitor chassis was back from repair, and after careful reinstallation, sprang back to life on the first power up without needing any adjustment.

BAS Cabinet with monitor
The BAS Cabinet with newly repaired monitor chassis installed

Up Next in Part 2

So next up in part 2 of this restoration blog will be the coin doors and other metalwork, the t-molding and bringing the marquee light back to life.  I’ll then assemble all the refurbished parts of this lovely old BAS arcade cabinet ready to play some classic games.

Huge thanks to gunblade from the UKVAC forum and Olly from arcadeartshop.com for their help with the restoration.

My BBC Micro Model B Restoration Project

What’s so special about the BBC Micro?

I’ve long been a fan of the BBC Micro, having first been introduced to the machine at School in the early 80’s.  As the owner of a primitive ZX81, the full colour graphics and proper keyboard made the BBC Micro seem so advanced compared to what I could use at home.  I would go along to computer club at lunchtimes to learn more about programming, but more often than not we would end up playing games such as Snapper and Planetoid – arcade perfect conversions of the titles we queued for in the local arcades at the time.

Eventually I would end up owning an Acorn Electron, a cut-down version of the BBC Micro that delivered most if not all of the BBC experience, but I still felt I was missing out, so ineventually saved up to buy a BBC Master Series computer, a more advanced version of the origianal.  This was the computer that got me through my A-Levels, including a Computer Science qualification that formed the basis for my degree, again in Computer Science.

So for me the BBC range of computers have always been special, and over 30 years after my first computer club, I decided to go out and find myself an original Beeb.

Which is the Best BBC Micro?

The Beeb came in two flavours, the Model A and the Model B, which differed based on the amount of RAM available, having 16k and 32k respectively.  The budget model A also had less hardware connectivity options, with various ports removed, and due to the lack of RAM could not support all of the available video modes. After the model B came “plus” models with greater memory, and ultimately the Master Series range which had 128k memory and ROM cartridge ports, as well as a separate numerical keyboard.

For me though it has always been the Model B with its iconic beige case, and the square footprint, which represented the BBC at its height, and also the first computer I truly listed after.    So off to eBay I went to look for a perfect working model.

BBC Micro Buying Advice

Like many aging home computers, there are a couple of things to look out for when considering your purchase.  The first is the keyboard – whether it be the Spectrums fragile keyboard membrane or the BBC’s well used buttons, these are often victims to the passage of time.  The second is the case, which can be subject to nasty yellowing with age: Vic 20’computers and BBC micros both suffered from this affliction, which is linked to flame retardants used to protect the machine’s plastics.  The final thing in the case of the BBC in particular is the power supply which can often fail.  The BBC has an on-board supply which features capacitors which can dry out with age, resulting eventually in a nasty but non-fatal “pop” accompanied by acrid smelling smoke.

So finding a good one is a case of trawling eBay for a cosmetically clean machine with a good keyboard that shows little signs of being fiddled with, and a pale cream rather than yellowy brown case.  If the seller shows the BBC working then then is is obviously a good sign, but it doesn’t mean the power supply isn’t fragile and could let go at any time. Fortunately this is an easy fix (more on this later).

My first BBC Micro Purchase

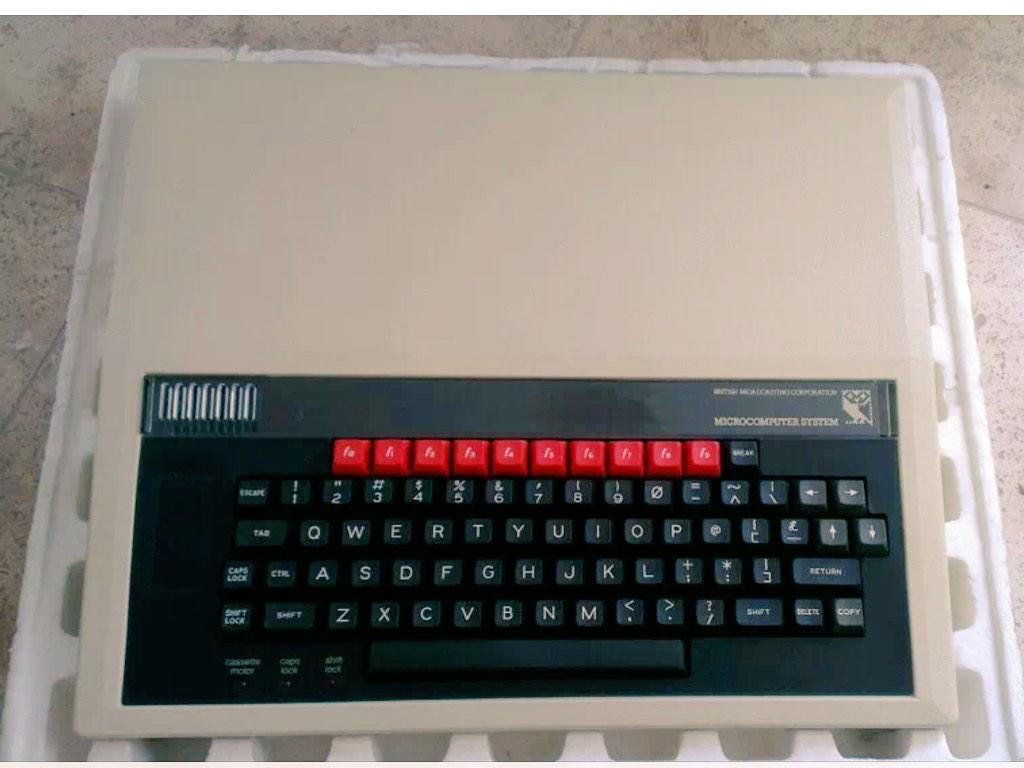
After being unsuccessful bidding on a “perfect” machine, mainly because I didn’t want to pay the silly money being asked for fully reconditioned boxes, I decided I would go for a fixer-upper that I could add some value to.  The first purchase was a  fully working model B that suffered from a bit of yellowing to the case, and as such fell into my budget – I picked this up for £30 plus postage.  After a nervous wait for delivery, I powered up the machine (which actually looked better than advertised) and plugged into a LCD monitor via a an RGB to Scart cable purchased online.  The classic twin tone beep told me things were going to be OK, the aging BBC Micro presenting me with the minimal start screen prompt.

bbc micro in polystyrene case
My BBC Micro

At this stage I couldn’t do much more with the machine as we were in the middle of a house renovation, so I stored the machine away with the intention of cleaning up the case in the summer after building work was complete.  I’d found a secret recipe online for renovating yellowed plastics, and as well as getting the power supply reconditioned, this would be my next step on the way to getting my perfect BBC Micro.

While the BBC Micro seemed to be working fine, something was missing and I realised that in order to truly recreate that 1982 Beeb experience I would need an appropriate display, namely a Microvitec Cub monitor.

The Microvitec Cub Monitor – The Perfect BBC Micro Companion

Back in computer club, there were 2 flavours of monitor, with both green-screen and full colour versions available.  The Microvitec Cub Monitor had the benefit of being painted the same colour as the BBC Micro, and would sit on a stand above the BBC Micro keyboard, it’s 14″ screen the perfect size in proportion to the computer case.  Connectivity was via an RGB cable which provided a perfectly stable image, much better than the TV connection, but still with the lovely CRT scan lines than would be missing from a modern LCD monitor.

BBC Micro with Microvitec Cub Monitor

After a few failed bids on some overpriced examples (obviously these devices are in huge demand from Beeb owners like me) I managed to find not one but two examples in an auction, the owner being local to me in Essex so having the advantage of not requiring postage.  In the end I picked up both at for £50 – a steal assuming I could offload one of them for the same and make this essentially a “free” monitor.

A quick trip to Southend, and I was in the possession of 2 very nice monitors, which both worked first time when plugged into my BBC micro via an RGB cable which came with the original BBC micro auction.  With building work still going on I packed them safely away in the loft until I had the space to assemble them properly.

BBC Micro Tape, Disk Drive or Flash Card?

The traditional BBC Micro gaming experience involved a portable cassette tape player and an agonising wait for your game to load (or not) into memory, the BBC like many early home computers not having any internal storage device such as a hard disk drive.  Given the fragile nature of cassette tape, or any 30 year old magnetic storage media for that matter, I decided that this would be a step too far, albeit the most authentic experience.  The disk drive approach was also rejected, which whilst quicker to load was not desirable due to the lack of original games still available to play on 5.25″floppy disk.

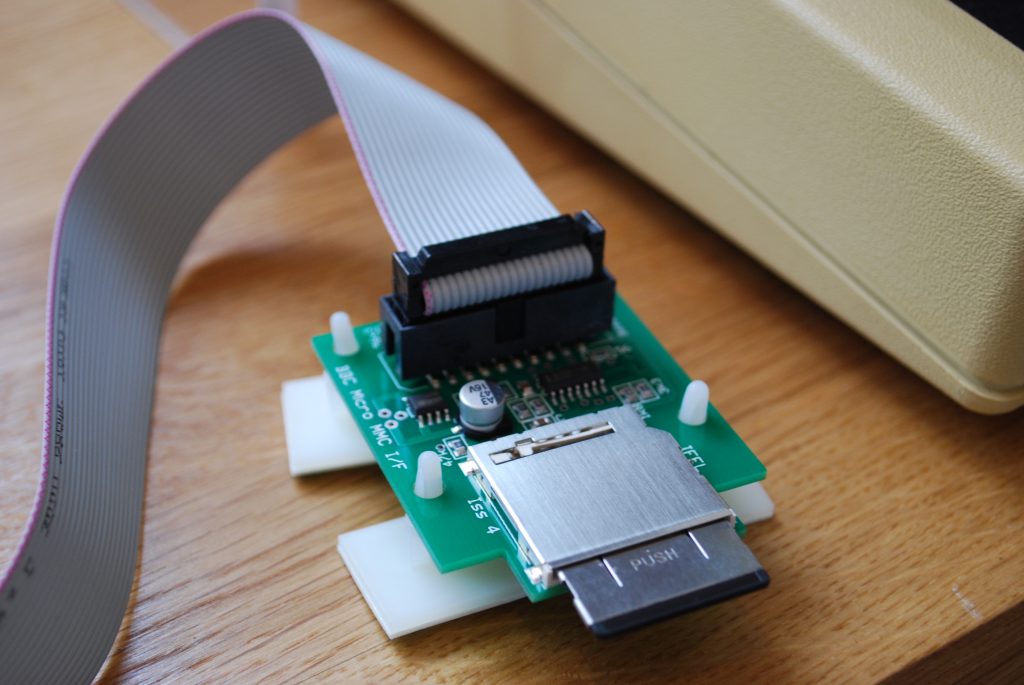
In the end I resorted to the most practical alternative, that of a custom flash drive connected to the original equipment via a special adaptor, to allow original BBC Micro games to be played without the need for more mechanical (and fallible) input devices and media.  Whilst there are potential objections to the use of copied disk images of these games, which are freely available on the Internet, my view is that I will only be playing games that I had already bought in the 80’s, so no harm is being done.

BBC Micro MMC Card Interface

After a bit of research I settled on an MMC based solution, which would allow me to play all of my old favourite games with the minimal of effort, and without the need to modify the BBC in any way apart from the insertion of a bespoke EPROM chip in an empty slot on the motherboard.

Repairing a Poorly BBC Micro

The time had come to assemble the respective components of my BBC Micro based system, which had actually grown in size since my original purchase, having found another mint but only partially working example on eBay.  I figured I should be able to make at least one perfect BBC out of my two purchases.

I decided that I would actually get both working, so I sent off my Beeb to Mark at Retro Clinic (www.retroclinic.com) for a service and for the all important capacitor replacement.  I’ve subsequently become a lot more confident with a soldering iron but in this case I wanted a professional job. A couple of weeks later and my BBC Micro was back with me and ready for installation of the MMC card interface.

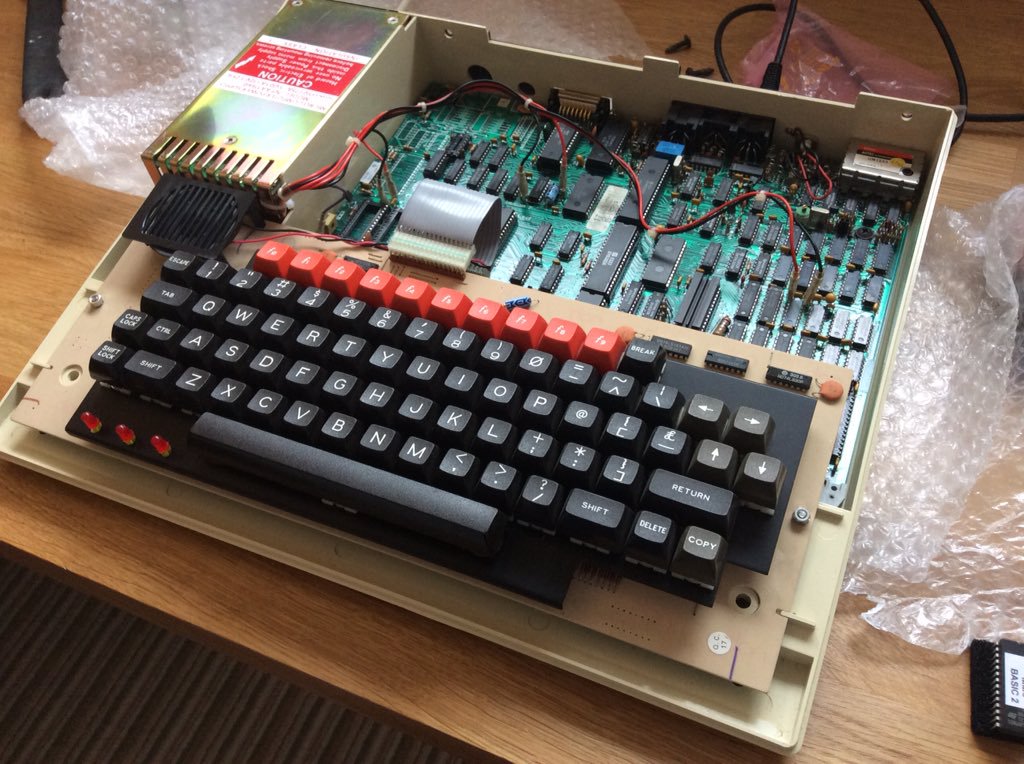
BBC Micro Case Internals PCB
BBC Micro Internals

The flash drive installation process ended up being very simple – open up the BBC Micro, find a spare ROM slot and carefully seat the custom ROM, taking care not to bend the pins.  Plug in the card to the serial interface, and turn her on.  The usual BBC prompt now featured the words Turbo MMC!

A quick instruction to call up the menu and the screen instantly showed the MMC Card Menu, with a list of installed games already in place.  No lengthy loading, quicker than a tape or even a floppy disk!

The Games – is the BBC Model B as good as I remembered?

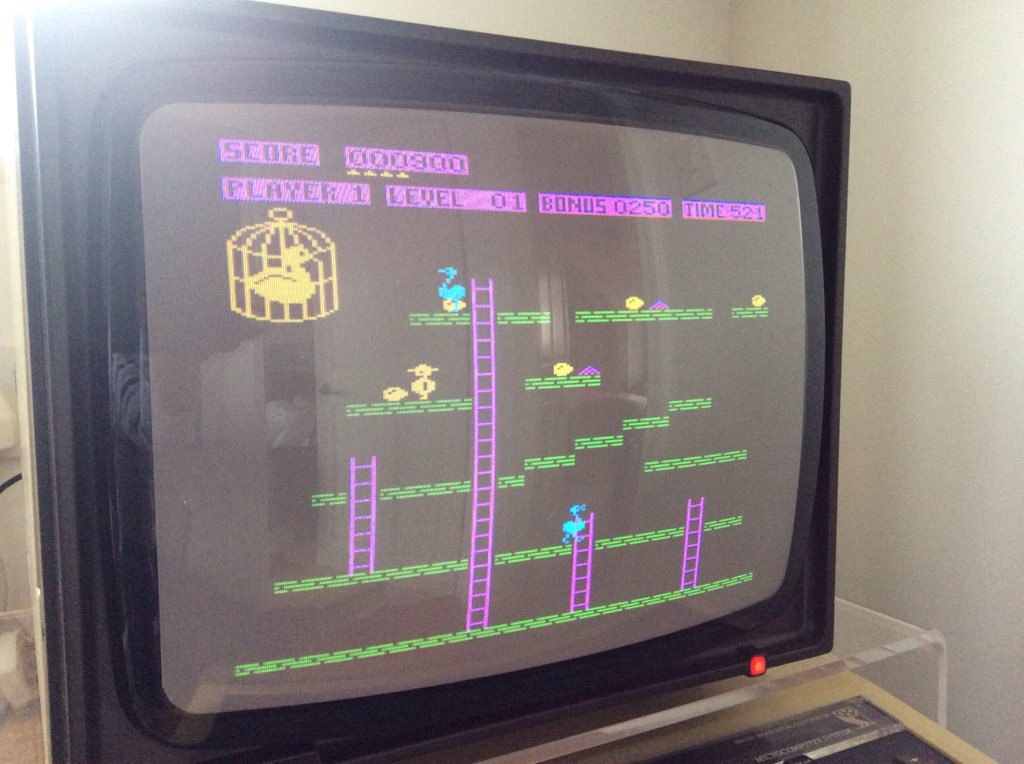
First stop – Chuckie Egg!  Followed by a huge list of my old favourites including Elite, Mr Ee!, Knight Lore, Daredevil Denis, Snapper, Planetoid and Killer Gorilla.  So many great memories, and the instant access of the MMC Card interface soon made up for the lack of loading screens.  And yes the BBC Model B can still recreate some of those early arcade games better than any home computer before or since.   Certainly up to the arrival of MAME on the PC.

Chuckle Egg!
Chuckle Egg!

I would highly recommend getting hold of one of these machines while they are still being found in lofts and garages, with bomb proof build quality and the availability of solid state interfaces and tape images of the old software titles freely available, it’s a great way to experience these classic games all over again.

Many thanks to Mark Haysman of RetroClinic, and Chris Pitts the creator of the MMC Interface 

Atari 2600 Restoration Part 2

The Classic Atari 2600 Woody Lives!

I’ve always had a soft spot for the Atari 2600, one of my first ever console experiences, and I have several in my collection. This is the second update on my latest 2600 restoration, and in the first blog update I focused on the cosmetic aspects – clearing away 30 years of dust and grime to reveal the fantastic console underneath.

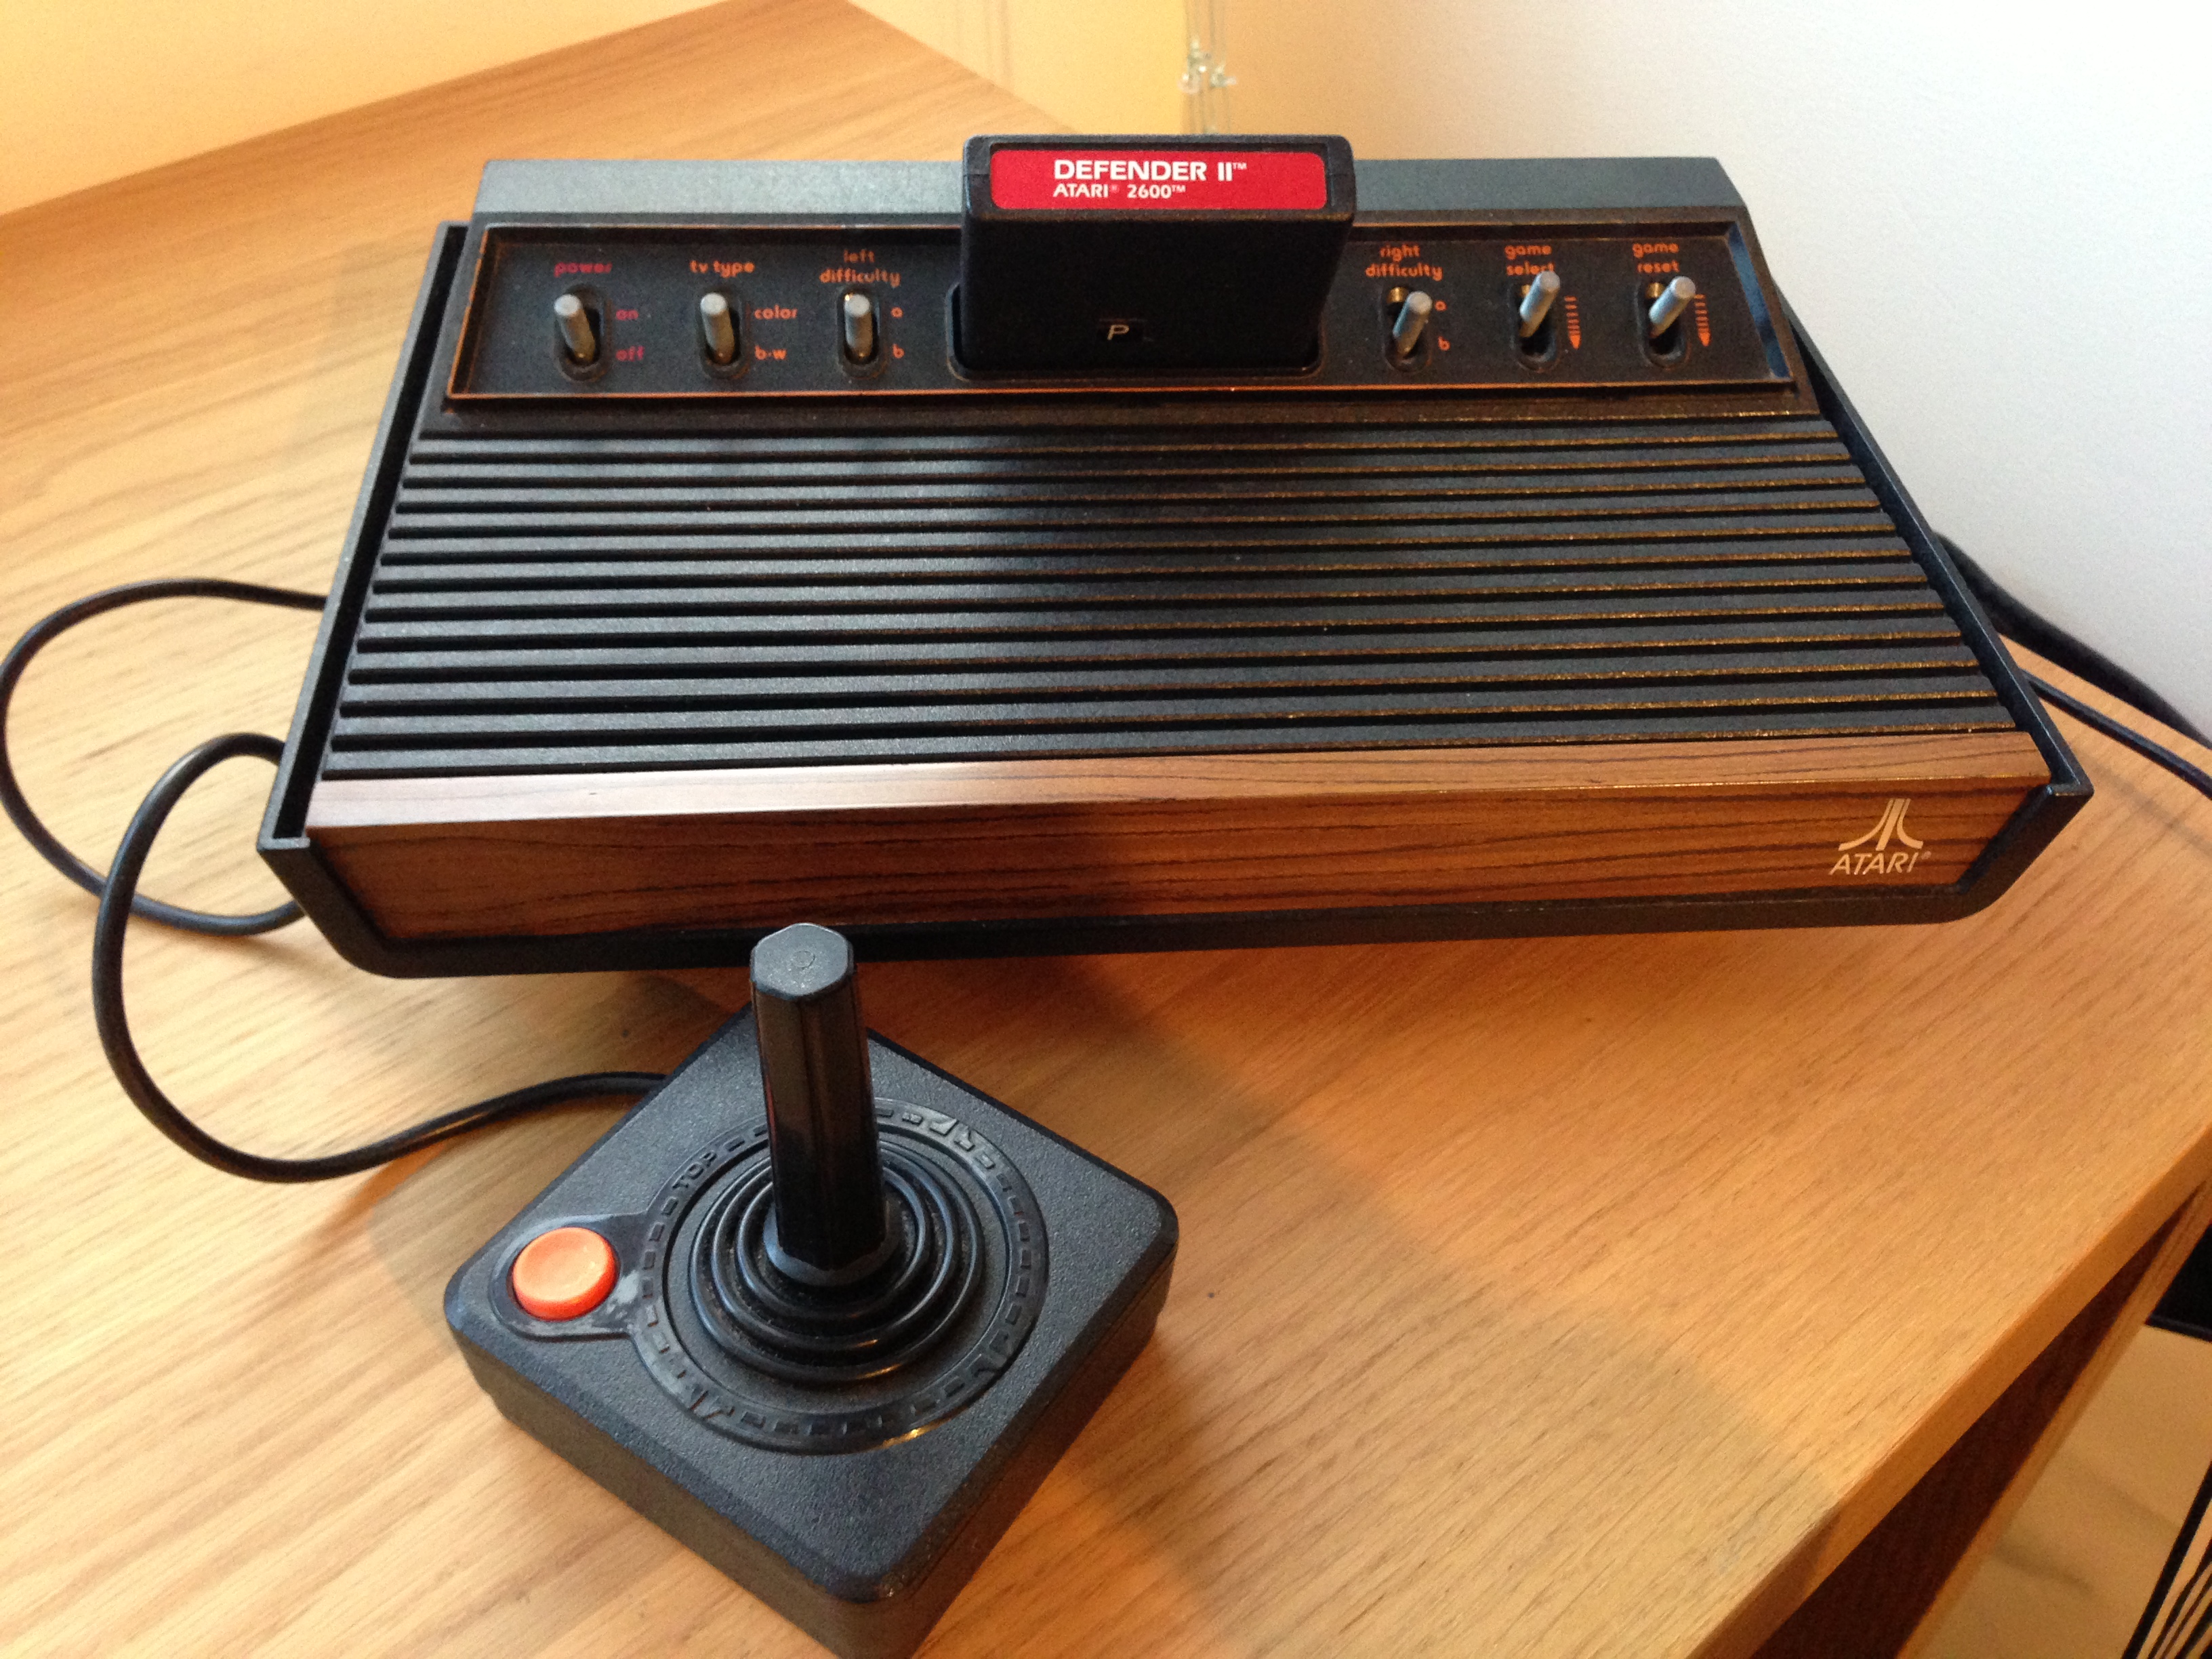
Atari 2600 with Joystick
My newly cleaned but untested Atari 2600
So I have a shiny old console, the big question is, after 35 years does it still work?  As I bought 2 Atari 2600 units untested, without a power adapter, my next job is to find a way of getting it up and running.

Without an original supply, and no Atari branded units available for sale anywhere, I was forced to look for a modern equivalent.  A quick browse of the internet and the specification for the power supply is confirmed as a 9V 500ma DC unit, which was readily available from the local Maplin store.  Unfortunately the interchangeable pins were not the right shape for the Atari, and I had to return for an alternative set.  Second time lucky the pin fitted, and on turning on the machine, perhaps for the first time in years, was presented with nothing to indicate it was on, not even a hum.  I’d have to insert a cartridge and connect it to a TV to find out if it even powers up.

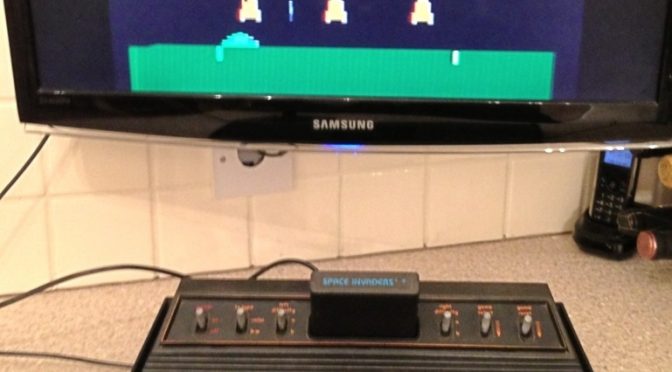
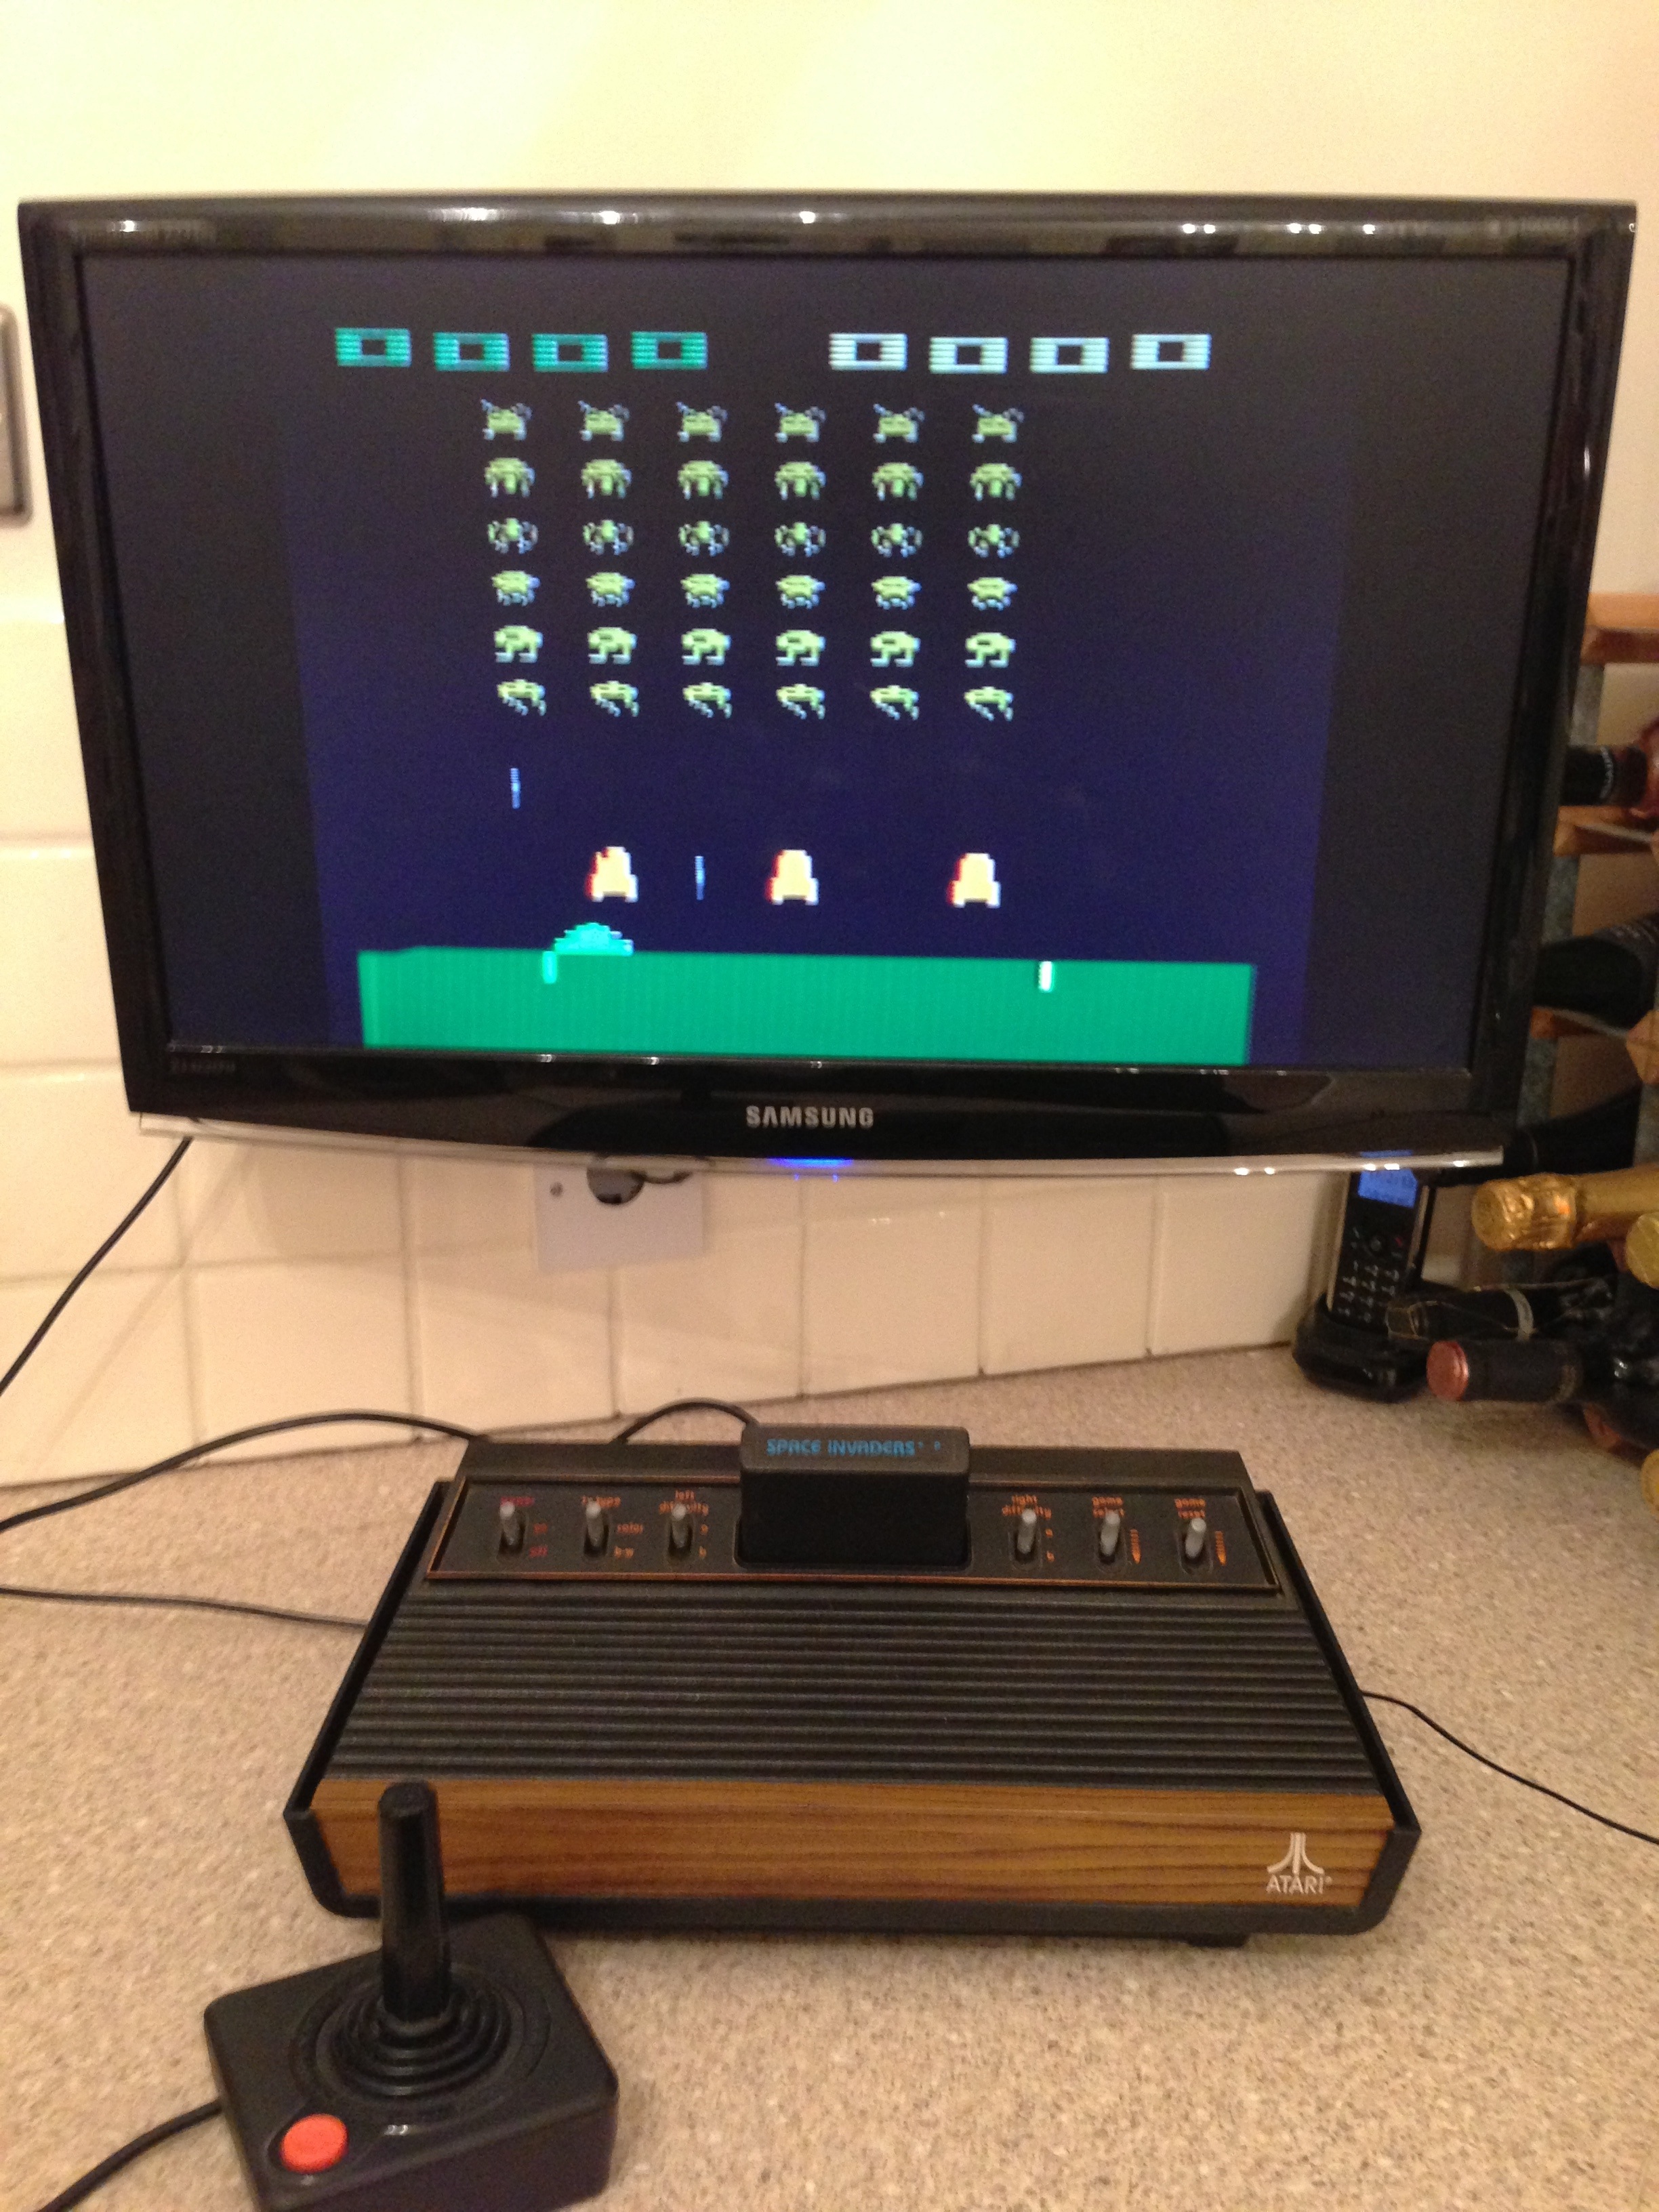
Using a Samsung TV which still has an old analogue TV tuner, I connected the Atari unit using the RF cable which is integrated into the console.  Tuning the TV was a little bit tricky, as I had to wade through the menu options to find the analogue auto-store feature which had never been used.   The TV cycled through the frequencies counting the signals found – a resolute zero until the magical channel 36 was reached when the channel count turned to a 1.  With the Space Invaders (what else?) cartridge in place, I waited for the screen to display the iconic images that would confirm my Atari was still alive.

20130217-203154.jpg
First image of working Atari 2600

Whilst the image was a bit fuzzy, the years of crisp PC graphics and more recently HD monitors spoiling me, it was definitely working.  Selecting the reset switch, the one player game started, accompanied by the unmistakable sound of alien invaders.  The joystick seems to be working, with the game playing just like a remember it, the pace spot on and as addictive as when I first played it back in 1980.  In fact I had been playing it for about an hour before I realised the time, and that I had a bag of around 20 cartridges to try out.

For the next couple of hours I relived memories of classic old games as I switched the cartridges in and out, with titles such as Asteroids, Galaxians and Stargate reminding me why I had loved the Atari 2600 so much in the first place – brilliant arcade conversions that should never have been possible on such basic hardware.  I was also reminded why the video game crash of the early 80’s was inevitable –truly abysmal games typified by the notoriously bad Pac Man, all flickery sprites and crappy gameplay.

My Atari joystick has however not stood the test of time, and whilst not obvious on games like Space Invaders, it can only register left, right and down.  On taking apart the handset (just 4 screws and a normal cross-head screwdriver) I had hoped to find some dirt on the contacts, but it was bad news, with the dome contact on the “up” circuit broken.

A quick look on the internet tells me that components to fix these old joysticks are not readily available, and so I put in a bid for another joystick which should be mine for less than a tenner.

My OCD is kicking in again, and I now want to collect all of the best Atari 2600 games, as well as replacing some with damaged labels and ink stained cases.  Perhaps I can clean them up and replace the stickers, it seems a shame to allow the games to go unrestored to their former glory.  Except maybe Pac Man, which if the stories are to be believed, should be in a Mexican landfill somewhere.

It may be that there are plenty of Atari 2600 games are still readily available on eBay, but it’s not like they are making any more, and every cartridge deserves to be preserved.

New to the RolyRetro Collection – Atari 2600 “Woody”

After years of retro games collecting I finally buy a pair of Atari 2600 consoles

Being an avid retro games collector with a minor case of OCD, I love nothing more than taking an old and unwanted console and bringing it back to life. The beauty of many of the old 80’s consoles is their construction – they were built from industrial strength materials, using plastics and sometimes metal that have stood the test of time. With very few moving parts and a very simple circuit board – I’m talking before the advent of CD-ROM – there was little to go wrong apart from worn out cartridge sockets and sticky switches. In many cases these consoles can be brought back to life with nothing more than some mild detergent and a bit of WD40.

The Atari 2600 is a classic example of this, with it’s bomb-proof plastic case hiding a nothing but air and a small circuit board powered by a MOS 6507 processor.

Atari 2600
My newly acquired Atari 2600 consoles and cartridges – before cleaning up

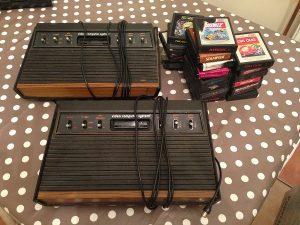
My latest acquisition was an untested pair of Atari 2600 “woody” variants, with the classic wood effect trim on the front of the machine, included with a bundle of games. I already have the all-black “Darth Vader” version of the console, but had been on the lookout for the woody version to complete my collection. I figured at least one of the two would work, and if I was lucky could sell one reconditioned and pay for the cost of the original purchase. In effect a free Atari 2600!

On picking up the games from the local eBay seller (and saving shipping fees) I investigated the two boxes as well as the game to understand just what I had bought – there are a few variations of the machines and I wanted to trace the serial numbers to understand their history. Fortunately, both machines seemed to be in very good, if dirty (hooray more cleaning) condition. One of the machines even had the reseller’s sticker on the rear indicating it was sold by Bakers of Clacton- on-Sea in Essex. I did check to see if by some miracle the shop still existed but it is no longer there.
Using the references available online from the AtariAge website, it appears that both are the CX2600 model, produced in Hong Kong from 1978 to 1980, as opposed to the original Sunnyvale model which was slightly heavier and produced in the US. They retain the 6 switches on the front of the unit, as well as the lovely wood panelling – a feature which I think Sony and Microsoft should bring back for the next generation of console hardware.

After a wonderful evening of polishing and dusting, the consoles have both cleaned up a treat, and look almost as good as when they rolled off the line 35 years ago in Honk Kong – the only visible signs of wear and tear being the worn orange pinstripe running around the switches. The worst part (or best depending on your personal levels of OCD) is the long plastic grooves on the top of the machine that need a good going over with cotton buds in order to scrape out 30 years of dust and grime.

The restored Atari 2600
Who knows how many hours of gaming these machines have seen, but they look like they are ready to go another 35. I’m not sure the original release of XBOX or PS3 machines will still work after 5 years, what with the red ring and yellow blinking lights of death, and in 30 years I doubt even the later versions will still be playable.

The next step is to plug them in and see if they still work, as well as checking out the big bag of cartridges which are in various states of disrepair, but hoping there might be some rare gem in there that I have not uncovered before. I’m also thinking that I might try a video mod to allow connection via a component cable, so I can play on a modern TV.

I’m hoping that both work – I’ll post another update when I have located a power supply and controllers and can fire up these classic consoles.