Tag Archives: Projects

BAS Arcade Cabinet Restoration – Part 2

Arcade cabinet restoration – the fun stuff

With the major repair work completed on the woodwork, monitor and control panel (covered in part 1) it was time to focus on the cosmetic aspects of the restoration of this BAS Arcade Cabinet.

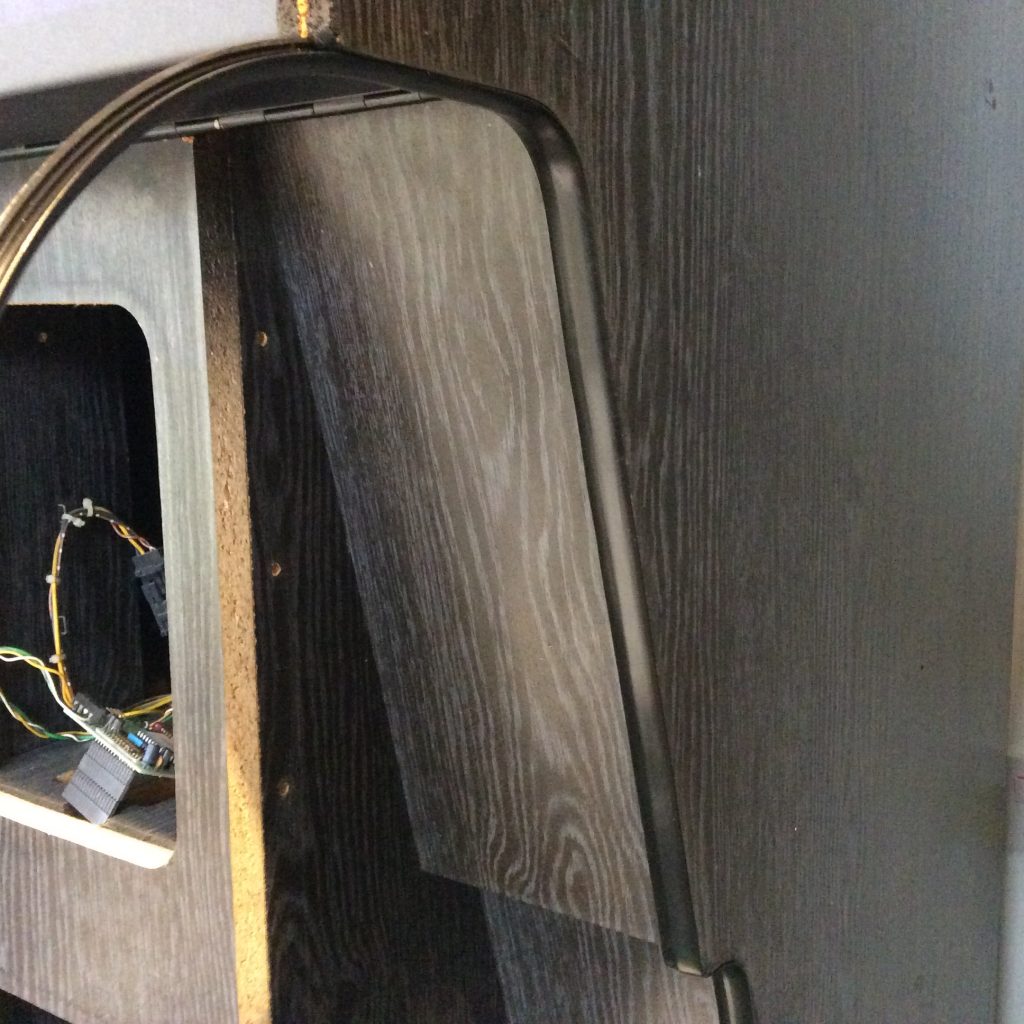
The cabinet itself was not in really bad shape, but the coin doors and metal trim had suffered from rust which was showing through the paint, and the lighting behind the marquee and coin slot was not working. There was also a very scruffy piece of rubber on the footrest of the cabinet which would need to be replaced. Finally I would need to replace the rubber t-molding which was removed when the cabinet was stripped for repair.

Stripping, Sanding and Painting

Starting with the metalwork, a lot of arcade restorers rely on the services of powder coating companies that will shot blast the old rust and paint away before apply a new powder coat. I decided on the DIY approach as I was interested in the quality of finish I could achieve myself, and if I was not satisfied there was nothing lost. I could always send off to the powder coaters to fix.

So I began the process of removing the metalwork, which was all conveniently bolted on. Off came the coin doors, metal edge trim and marquee retainers as well as all the various nuts and bolts which would also need to be treated.

Testing paint stripper
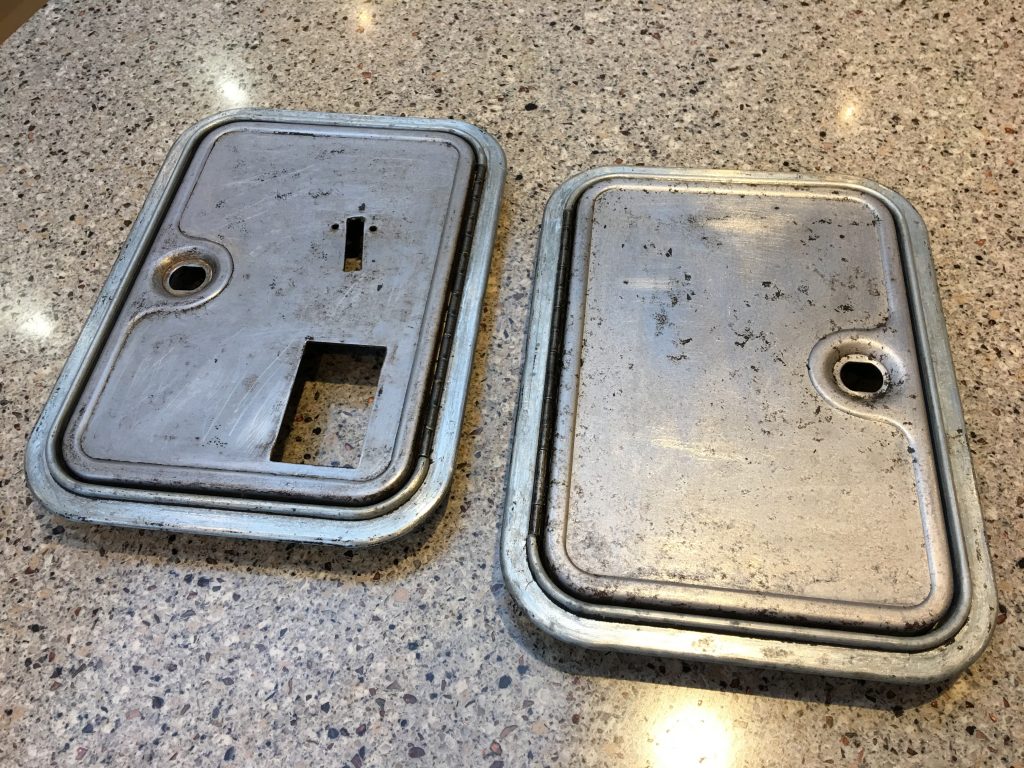
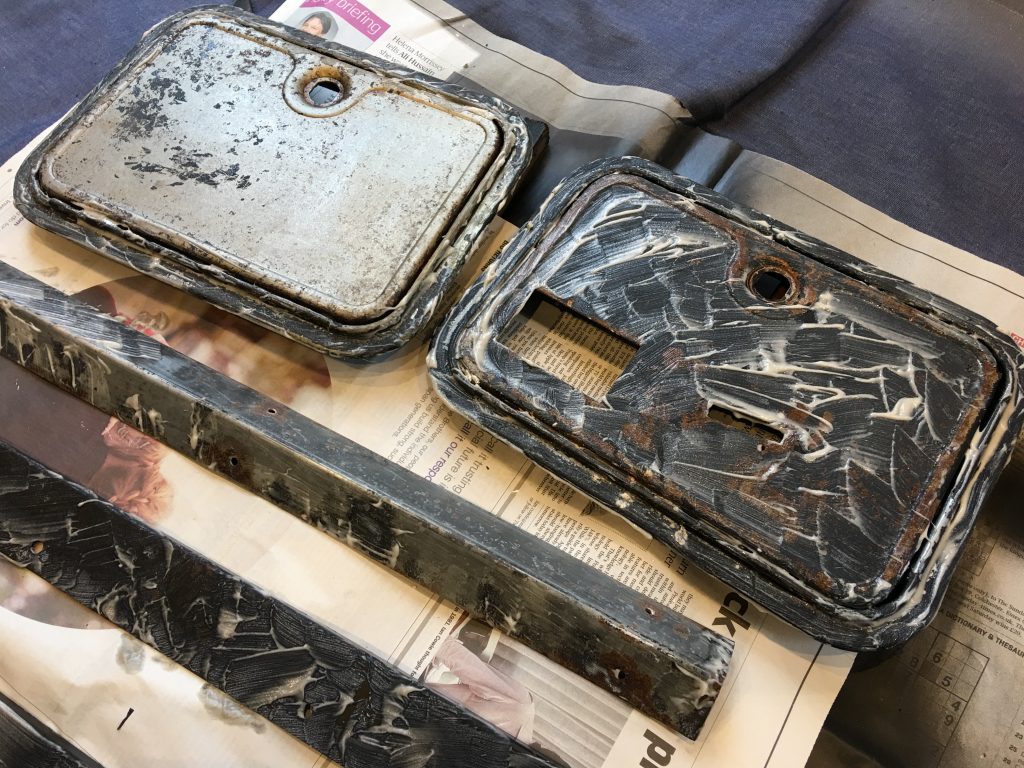
Testing the paint stripper on the rusted doors

My plan was to use a paint stripper to remove the worst of the paint chemically before sanding off the residue and using a rust converter if necessary before priming and painting. As you can see from this picture the stripper paste was very effective on the coin doors, albeit after some experimentation with thicknesses of paste and time left on the paintwork.

Pain stripper on the coin doors
Using paint stripper on the rusted coin doors
Coin doors stripped
Coin doors stripped and ready for sanding and primer

The metal trim pieces were a lot easier to treat than the coin doors as the paint was thinner and the surface nice and flat.

After a bit of sanding by hand to remove the rust I applied some rust converter fluid to make sure it wouldn’t bubble up again before preparing for primer. I decided to use PlastiCote as I had heard good things about this paint, and to use standard rattle cans for the best finish without special spray equipment.

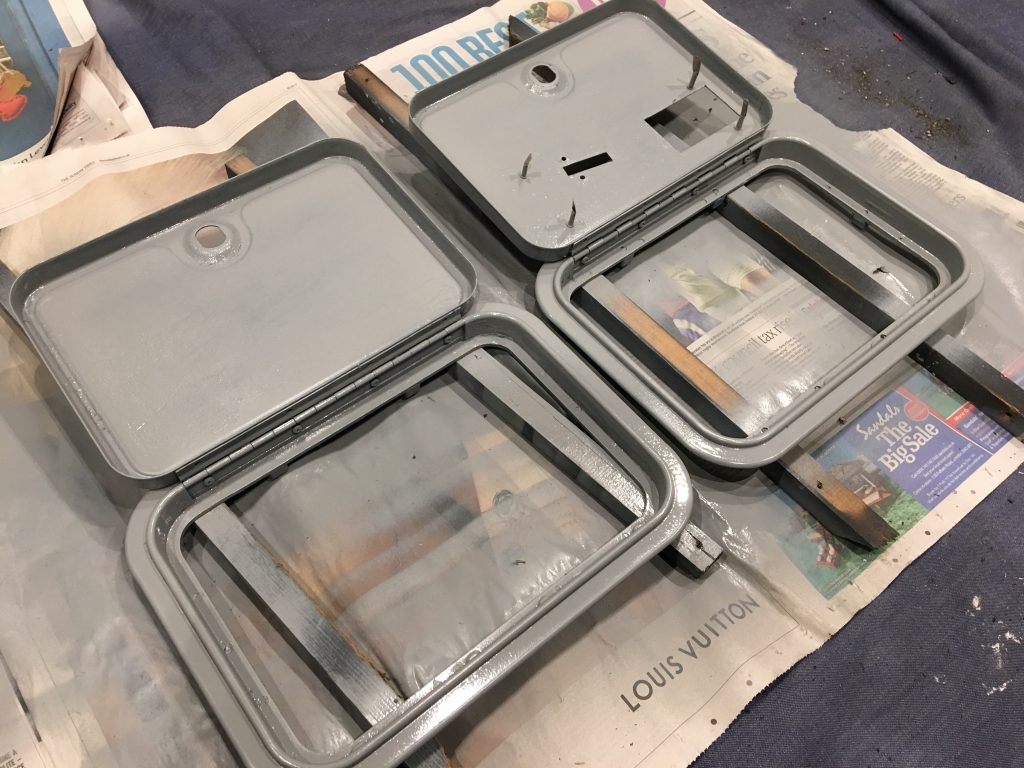
I took my time and applied the grey primer as per the instructions in light coats with a short drying period in between. After 24 hours I then sanded to remove any imperfections and give the paint a key for the black topcoat. I selected a satin paint that resembled the original, although some people prefer the crackle type finish you get with Hammerite.

Coin doors primed
Coin doors primed ready for top coat
Primed metalwork
Metalwork is primed ready for top coat

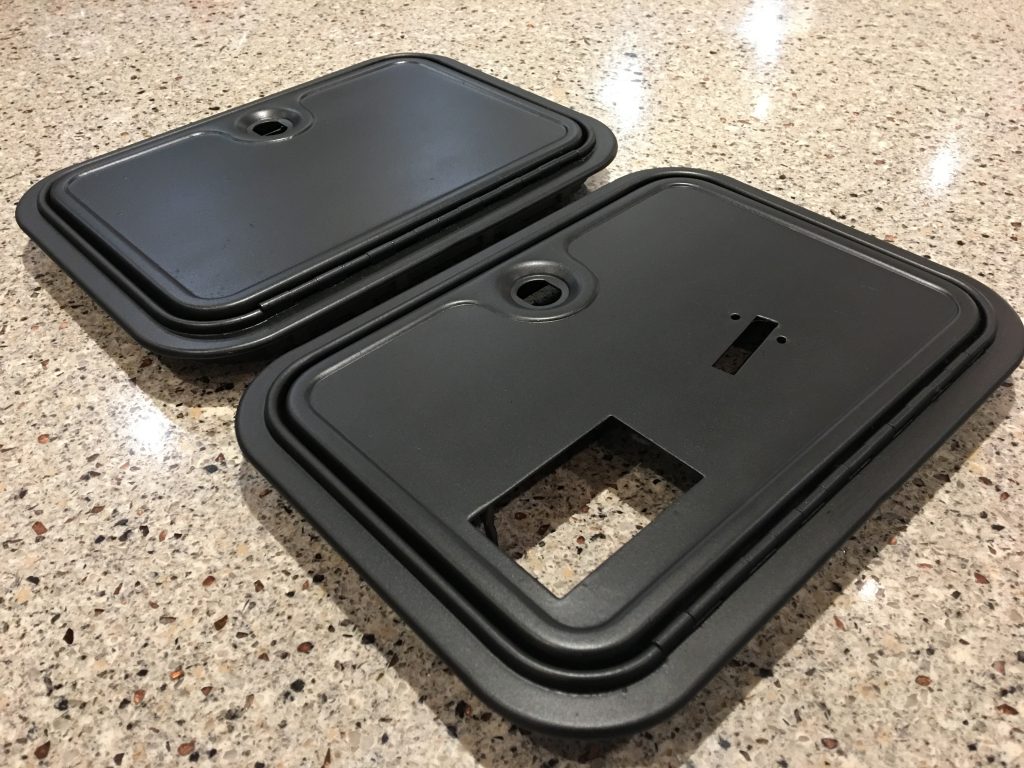
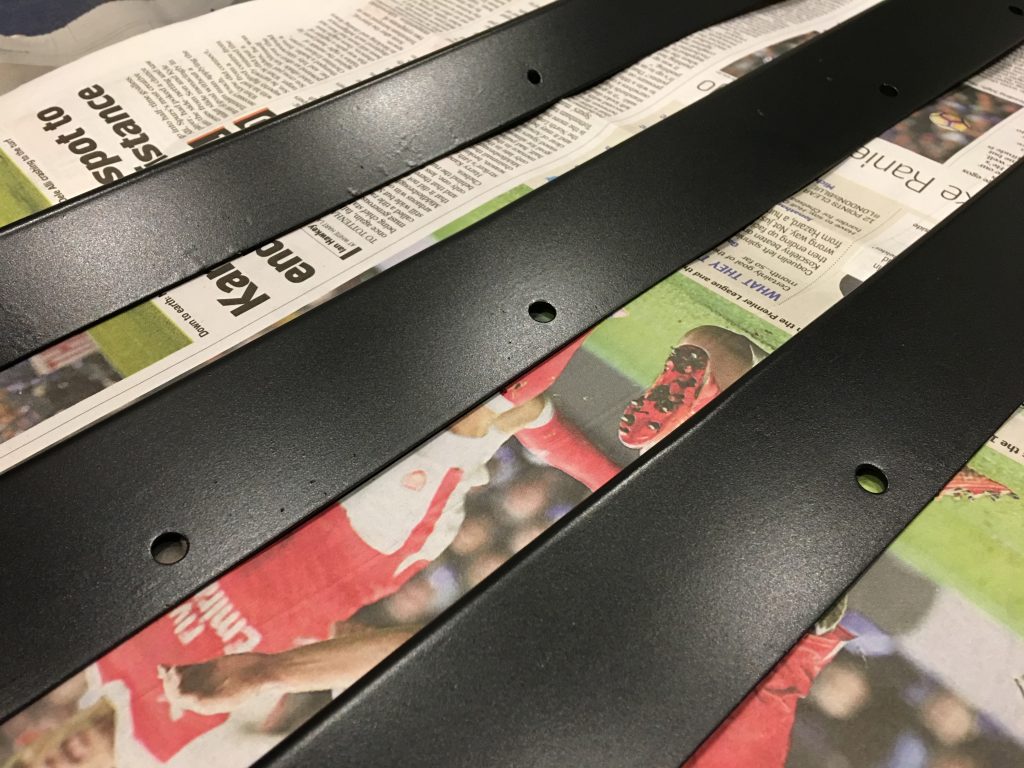
The paint went on smoothly and again I took my time with light coats, and a short drying period in between. At this point I could tell how the doors were going to come out and I was really pleased with the result. It’s not going to be as perfect or hard wearing as a powder coat but it was very satisfying, being my first attempt at metal finishing.

Coin doors painted
The coin doors finished in satin black
Metal satin black
Metal components with several coats of satin black

Fitting an LED Marquee Light

I set the freshly painted metalwork to one side to harden off a bit more while I focused on other jobs, the next fix being a new light for the marquee. The original marquee had a fluorescent tube, as did all arcade machines of the era, but I decided I wanted to use LEDs, as they are cheaper, last longer and generate less heat than an old tube. As they are not really visible anyway there is no argument to keep them, even for the purposes of authenticity, as an LED array can generate a similar lighting effect. I chose a pre-made 12V unit built for use as a caravan light, as it would be easy to hook up to a spare output from the existing transformer.

The LED unit fit nicely in the space vacated by the fluorescent tube, attached to an angle bracket with some vecro in case it needed adjustment to get the best marquee lighting effect. I need’nt have worried as the light looked great behind the marquee, which I reattached with the freshly painted retainers. I even treated myself to new black screws as they would be visible under the marquee. I kept the marquee original as it is such a great design, and I plan to use this cabinet as a multi-game unit so want to keep it generic.

LED marquee
The new LED marquee light fitted
testing marquee
Testing the new LED marquee light


Restoring the base of the cabinet

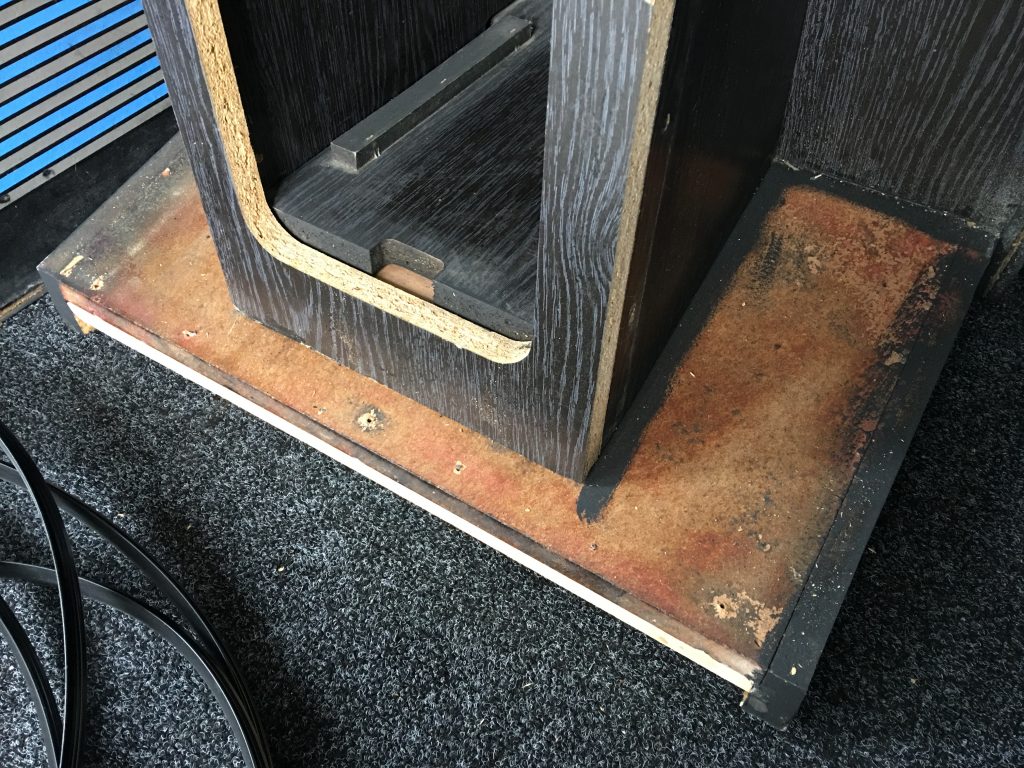
With the marquee in place I turned my attention to the base of the machine, and removed the tatty old rubber matting. I filled all the old screw holes and painted the edges with matt black paint in case any showed through the new matting and metal edge protectors. I then cut some new rubber matting (a bargain at £7 for a 2 meter roll including delivery) and fit it around the base. With the metal edge protectors fitted and new black screws the bottom of the machine looked as good as new.

The base of the BAS cabinet
The base of the cabinet stripped of old rubber mat

With the rubber mat replaced and coin doors test fitted the base of the cabinet looks as good as new.

Cabinet base complete
The cabinet base fitted with new matting and freshly painted metalworkOne of the easiest ways to cheaply and easily smarten up a tired arcade cabinet is to replace the t-molding which costs around a £1 per foot, and takes around 30 minutes a side to fit. Once the old t-Molding is removed with the help of a screwdriver blade, the new t-molding is just hammered gently in with a rubber mallet. For any corners, you just need to cut or nick the plastic to allow it to bend properly and for a tight fit.


T molding
Applying T Molding to the tricky corners
New t molding
Applying new t-molding to the BAS Cabinet

Finishing Touches

The final step was to fit the coin doors, which bolted back on easily and some new locks added, cheap as chips on eBay but make a huge difference to the look of the doors. As you can see the result is an “as new” set of coin doors for the cost of a couple of cans of paint and some elbow grease.

Finished coin door
The finished coin door reassembled with new locks

The final touch, which only came to light after I reattached the coin doors, was the lack of lighting behind the coin slot. A trip to Halfords later and I had a new bulb, a common item which is also used for car indicators so easy to source.

Coin door bulb
Coin door with indicator bulb from Halfords

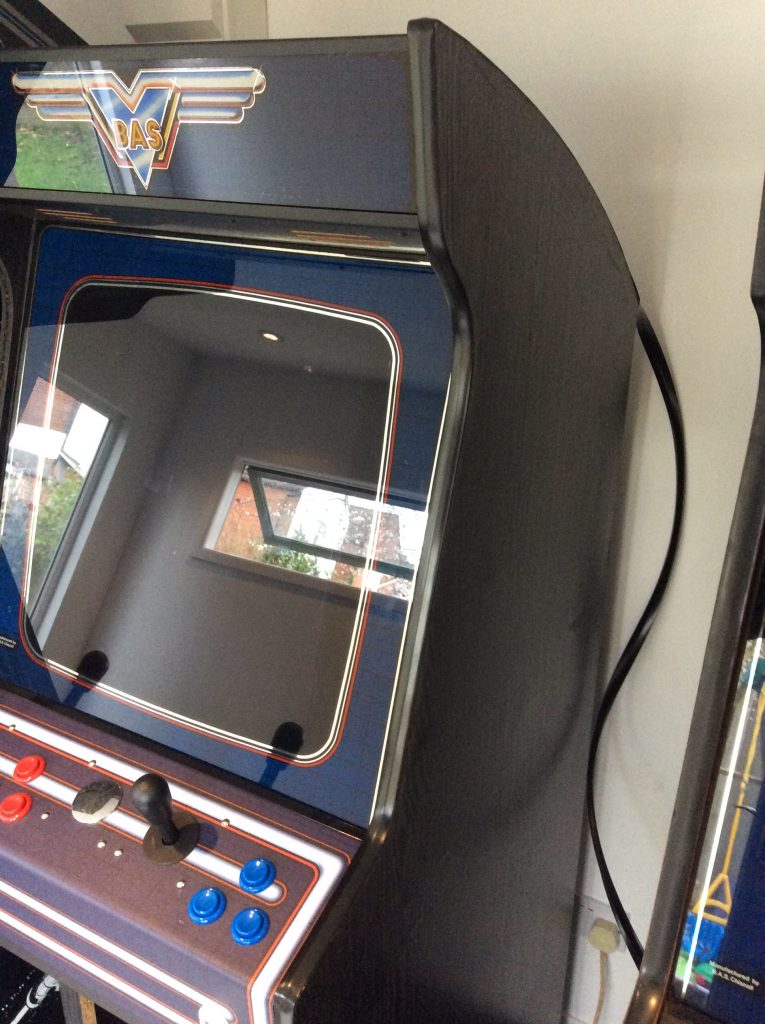
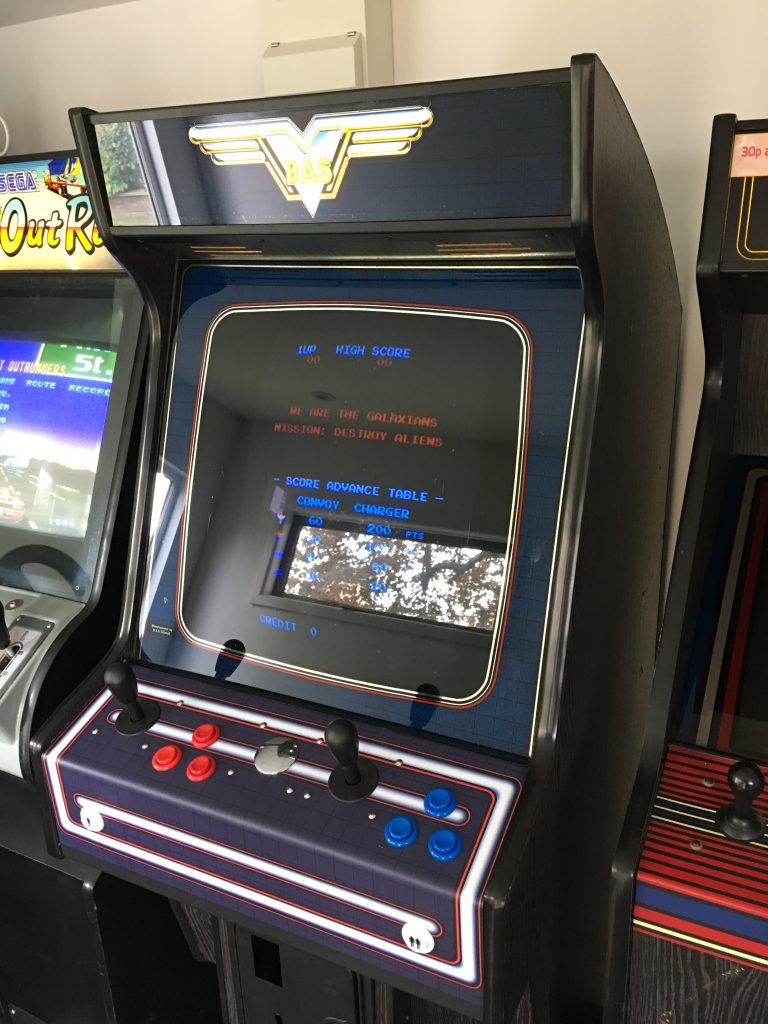
So that’s about it for this project, the BAS JAMMA cabinet is complete and ready for another 30 years of arcade gaming. This will be my “vertical” games cabinet, with a 60-in-1 board for now, while I develop a MAME based solution with access to more classic arcade games.

Now I’ve completed this restoration I much more confident I can tackle a dedicated arcade cabinet, and not make huge mess of an irreplaceable piece of gaming history.

Finished BAS cabinet
The finished BAS cabinet

My BBC Micro Model B Restoration Project

What’s so special about the BBC Micro?

I’ve long been a fan of the BBC Micro, having first been introduced to the machine at School in the early 80’s.  As the owner of a primitive ZX81, the full colour graphics and proper keyboard made the BBC Micro seem so advanced compared to what I could use at home.  I would go along to computer club at lunchtimes to learn more about programming, but more often than not we would end up playing games such as Snapper and Planetoid – arcade perfect conversions of the titles we queued for in the local arcades at the time.

Eventually I would end up owning an Acorn Electron, a cut-down version of the BBC Micro that delivered most if not all of the BBC experience, but I still felt I was missing out, so ineventually saved up to buy a BBC Master Series computer, a more advanced version of the origianal.  This was the computer that got me through my A-Levels, including a Computer Science qualification that formed the basis for my degree, again in Computer Science.

So for me the BBC range of computers have always been special, and over 30 years after my first computer club, I decided to go out and find myself an original Beeb.

Which is the Best BBC Micro?

The Beeb came in two flavours, the Model A and the Model B, which differed based on the amount of RAM available, having 16k and 32k respectively.  The budget model A also had less hardware connectivity options, with various ports removed, and due to the lack of RAM could not support all of the available video modes. After the model B came “plus” models with greater memory, and ultimately the Master Series range which had 128k memory and ROM cartridge ports, as well as a separate numerical keyboard.
For me though it has always been the Model B with its iconic beige case, and the square footprint, which represented the BBC at its height, and also the first computer I truly listed after.    So off to eBay I went to look for a perfect working model.

BBC Micro Buying Advice

Like many aging home computers, there are a couple of things to look out for when considering your purchase.  The first is the keyboard – whether it be the Spectrums fragile keyboard membrane or the BBC’s well used buttons, these are often victims to the passage of time.  The second is the case, which can be subject to nasty yellowing with age: Vic 20’computers and BBC micros both suffered from this affliction, which is linked to flame retardants used to protect the machine’s plastics.  The final thing in the case of the BBC in particular is the power supply which can often fail.  The BBC has an on-board supply which features capacitors which can dry out with age, resulting eventually in a nasty but non-fatal “pop” accompanied by acrid smelling smoke.

So finding a good one is a case of trawling eBay for a cosmetically clean machine with a good keyboard that shows little signs of being fiddled with, and a pale cream rather than yellowy brown case.  If the seller shows the BBC working then then is is obviously a good sign, but it doesn’t mean the power supply isn’t fragile and could let go at any time. Fortunately this is an easy fix (more on this later).

My first BBC Micro Purchase

After being unsuccessful bidding on a “perfect” machine, mainly because I didn’t want to pay the silly money being asked for fully reconditioned boxes, I decided I would go for a fixer-upper that I could add some value to.  The first purchase was a  fully working model B that suffered from a bit of yellowing to the case, and as such fell into my budget – I picked this up for £30 plus postage.  After a nervous wait for delivery, I powered up the machine (which actually looked better than advertised) and plugged into a LCD monitor via a an RGB to Scart cable purchased online.  The classic twin tone beep told me things were going to be OK, the aging BBC Micro presenting me with the minimal start screen prompt.

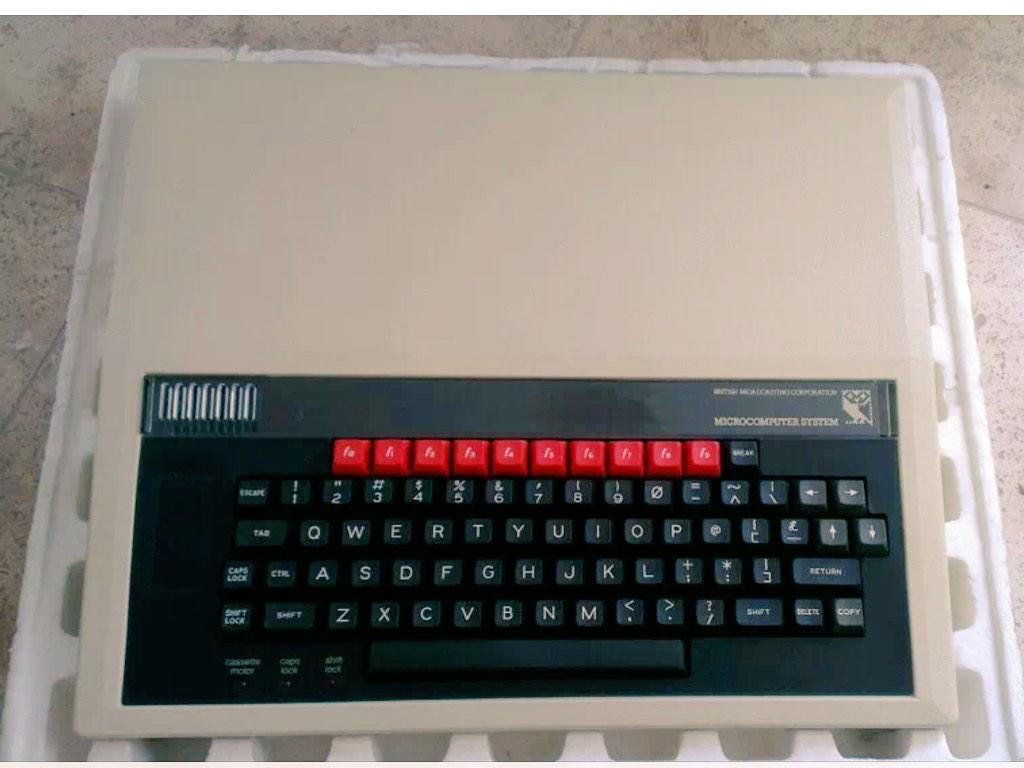
bbc micro in polystyrene case
My BBC Micro

At this stage I couldn’t do much more with the machine as we were in the middle of a house renovation, so I stored the machine away with the intention of cleaning up the case in the summer after building work was complete.  I’d found a secret recipe online for renovating yellowed plastics, and as well as getting the power supply reconditioned, this would be my next step on the way to getting my perfect BBC Micro.

While the BBC Micro seemed to be working fine, something was missing and I realised that in order to truly recreate that 1982 Beeb experience I would need an appropriate display, namely a Microvitec Cub monitor.

The Microvitec Cub Monitor – The Perfect BBC Micro Companion

Back in computer club, there were 2 flavours of monitor, with both green-screen and full colour versions available.  The Microvitec Cub Monitor had the benefit of being painted the same colour as the BBC Micro, and would sit on a stand above the BBC Micro keyboard, it’s 14″ screen the perfect size in proportion to the computer case.  Connectivity was via an RGB cable which provided a perfectly stable image, much better than the TV connection, but still with the lovely CRT scan lines than would be missing from a modern LCD monitor.

BBC Micro with Microvitec Cub Monitor

After a few failed bids on some overpriced examples (obviously these devices are in huge demand from Beeb owners like me) I managed to find not one but two examples in an auction, the owner being local to me in Essex so having the advantage of not requiring postage.  In the end I picked up both at for £50 – a steal assuming I could offload one of them for the same and make this essentially a “free” monitor.

A quick trip to Southend, and I was in the possession of 2 very nice monitors, which both worked first time when plugged into my BBC micro via an RGB cable which came with the original BBC micro auction.  With building work still going on I packed them safely away in the loft until I had the space to assemble them properly.

BBC Micro Tape, Disk Drive or Flash Card?

The traditional BBC Micro gaming experience involved a portable cassette tape player and an agonising wait for your game to load (or not) into memory, the BBC like many early home computers not having any internal storage device such as a hard disk drive.  Given the fragile nature of cassette tape, or any 30 year old magnetic storage media for that matter, I decided that this would be a step too far, albeit the most authentic experience.  The disk drive approach was also rejected, which whilst quicker to load was not desirable due to the lack of original games still available to play on 5.25″floppy disk.

In the end I resorted to the most practical alternative, that of a custom flash drive connected to the original equipment via a special adaptor, to allow original BBC Micro games to be played without the need for more mechanical (and fallible) input devices and media.  Whilst there are potential objections to the use of copied disk images of these games, which are freely available on the Internet, my view is that I will only be playing games that I had already bought in the 80’s, so no harm is being done.

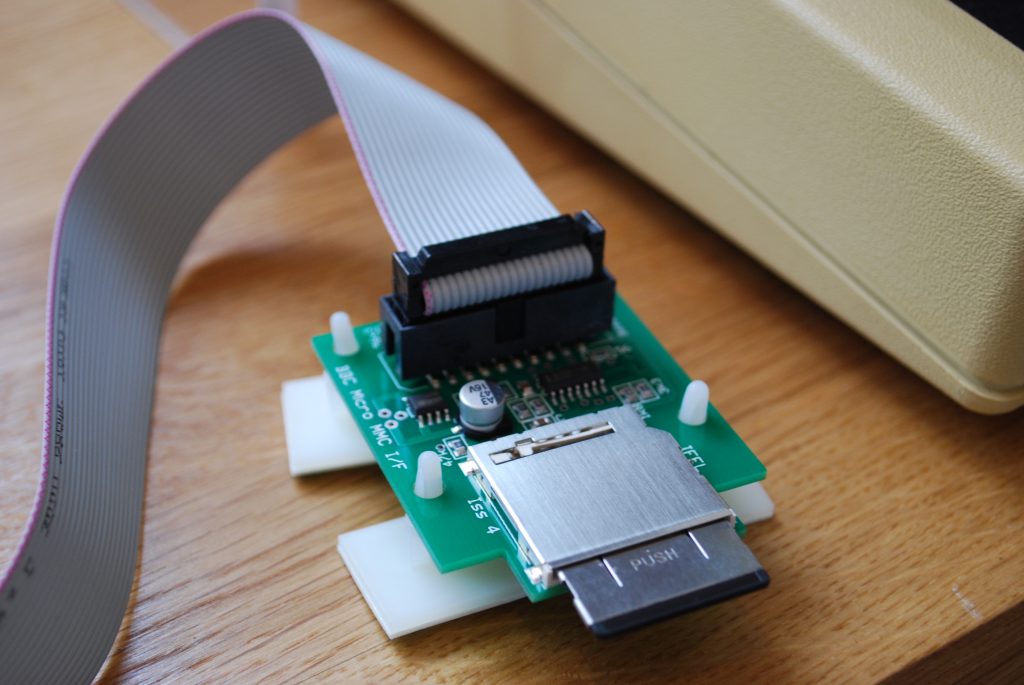
BBC Micro MMC Card Interface

After a bit of research I settled on an MMC based solution, which would allow me to play all of my old favourite games with the minimal of effort, and without the need to modify the BBC in any way apart from the insertion of a bespoke EPROM chip in an empty slot on the motherboard.

Repairing a Poorly BBC Micro

The time had come to assemble the respective components of my BBC Micro based system, which had actually grown in size since my original purchase, having found another mint but only partially working example on eBay.  I figured I should be able to make at least one perfect BBC out of my two purchases.

I decided that I would actually get both working, so I sent off my Beeb to Mark at Retro Clinic (www.retroclinic.com) for a service and for the all important capacitor replacement.  I’ve subsequently become a lot more confident with a soldering iron but in this case I wanted a professional job. A couple of weeks later and my BBC Micro was back with me and ready for installation of the MMC card interface.

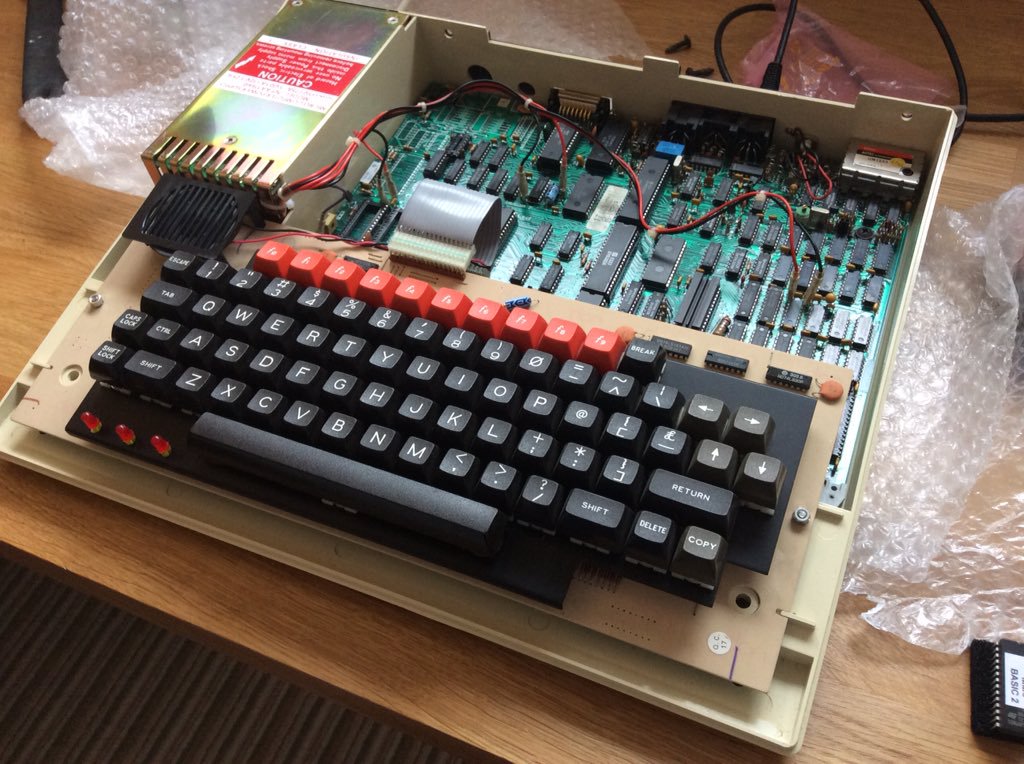
BBC Micro Case Internals PCB
BBC Micro Internals

The flash drive installation process ended up being very simple – open up the BBC Micro, find a spare ROM slot and carefully seat the custom ROM, taking care not to bend the pins.  Plug in the card to the serial interface, and turn her on.  The usual BBC prompt now featured the words Turbo MMC!

A quick instruction to call up the menu and the screen instantly showed the MMC Card Menu, with a list of installed games already in place.  No lengthy loading, quicker than a tape or even a floppy disk!

The Games – is the BBC Model B as good as I remembered?

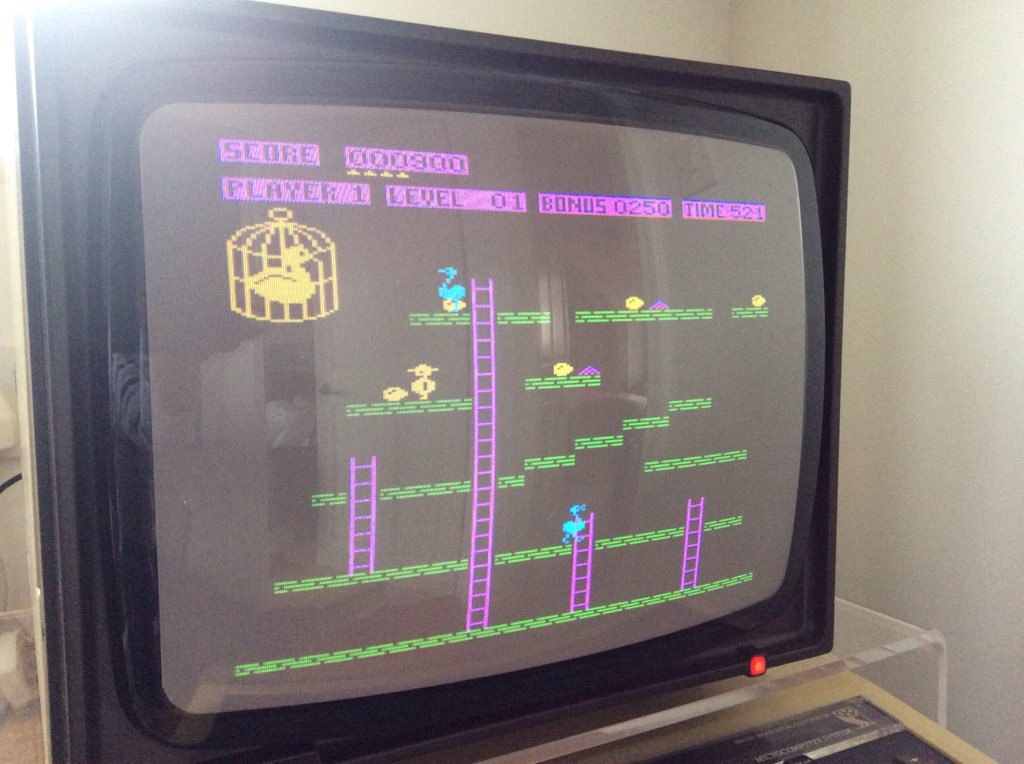
First stop – Chuckie Egg!  Followed by a huge list of my old favourites including Elite, Mr Ee!, Knight Lore, Daredevil Denis, Snapper, Planetoid and Killer Gorilla.  So many great memories, and the instant access of the MMC Card interface soon made up for the lack of loading screens.  And yes the BBC Model B can still recreate some of those early arcade games better than any home computer before or since.   Certainly up to the arrival of MAME on the PC.

Chuckle Egg!
Chuckle Egg!

I would highly recommend getting hold of one of these machines while they are still being found in lofts and garages, with bomb proof build quality and the availability of solid state interfaces and tape images of the old software titles freely available, it’s a great way to experience these classic games all over again.

Many thanks to Mark Haysman of RetroClinic, and Chris Pitts the creator of the MMC Interface 

MAME Cabinet Project Update – It’s Alive!

It’s been a few months since my last upate, after picking up this project in November 2011. In the last update I was assessed the state of the machine components I had been collecting and revisited the half-finished cabinet. I’m on the home straight, with much of the major construction work done already, I now need to assemble all of the elements of the MAME machine.

Rebuilding the Control Panel

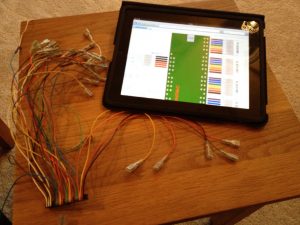
Rewiring the loom for the Minipac encoder

I thought that my control panel was complete after the last update, but after plugging into the Dell desktop I am using to host the MAME software, I found that the keyboard encoder was no longer working.  This model used the old style PS2 keyboard interface, and I think the Dell was struggling with it under Windows XP, so I took the decision to replace with a new “Minipac” encoder from Ultimarc with a USB connector.

Unfortunately this required a different wiring loom to the one I had installed, requiring a trip to Maplins for a new PCB connector and a comprehensive rewire.  In hindsight I probably should have replace the whole wiring loom as well, but I did get a cetain satisfaction from completing the rewire.

 Attaching Control Panel to the Cabinet

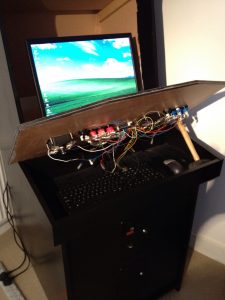
MAME Cabinet with Control Panel Lifted

With my shiny new Minipac in place, and the wiring complete, it was time to attach the control panel to the main cabinet.  I had previous created a box to fit beneath the control panel to allow for easy access to the controls for maintenance, and also to store the keyboard and mouse which are needed (at least until I fit a decent MAME front end software) to operate the PC.  I had cut a large hole in the back of the box which allowed the cables for the Minipac, the keyboard and the mouse to feed down to the PC in the main cabinet.

All seemed to fit together well, but I realised I still need to fit some kind of latch to hold the panel open for when I need to work on it (a hammer does just fine for now). I also need to fit the T-Moudling along the edge of the control panel, which I can do later as I have already routed the groove needed to hold the moulding in place. I haven’t routed the edge of the cabinet yet, which I may come to regret later as this is a messy job, but that’s a problem for another day.

Install MAME Software and Test

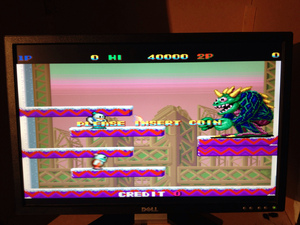
MAME working! Screenshot is of Snow Bros

Before I could test with MAME, I needed to program the control panel to make sure all the buttons were mapped to the keyboard inputs correctly.  Ultimarc provide a really good utility for this, and it’s also a good way of testing that all of the wiring to the Minipac has been effective.   After mapping to my specific panel, and addressing some loose wires, the controls seemed to be working and registering key presses and joystick movements.

I had not downloaded the MAME software on this PC yet, so I needed to access the latest version from the MAME website.  Not only did this give me a chance to try out the keyboard and mouse in place under the control panel, but also the cheap wireless card I had fitted to the PC, to save messing about with transferring files manually.

I soon had the MAME software working, and located a couple of ROMs to test the interface, starting with Phoenix (my all time favourite arcade game) and Snow Bros.  After a bit of fiddling around under the keyboard to enter a credit (I don’t have the coin door working yet) I was ready to go!

After waiting so long (remember I started this project back in 2004) it was great to finally be using the cabinet, and it felt fantastic. The height and positioning of the controls seem perfect, and the feel of the joystick and buttons 100% authentic. At this stage it would be very tempting to just load up my favourite ROMs and start playing, but I have a few more jobs to do now and a renewed enthusiasm to complete the build.

Building the Coin Door

MAME Coin Door
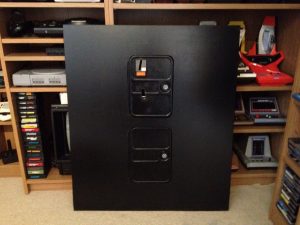
Front Panel with Coin Doors in Place

I had previously purchased a pair of coin doors from eBay, so these just needed to be tidied up with a bit of sandpaper, and some Hammerite added in places to address a bit of corrosion.  The doors would be permanently embedded in the front panel, but not designed to open as I would be putting the whole of the front panel on a hinge to enable access to the machine’s interior.

After drawing around the front panel, I just had to cut out the wholes with a jigsaw, and prime and paint the panel with  black latex paint.  The doors were then attached along the original door hinges and locked closed in the panel.  The doors look great and add a huge amount of authenticity to the otherwise plain machine, and I would recommend to anyone looking to undertake a MAME cabinet build.

Final Assembly

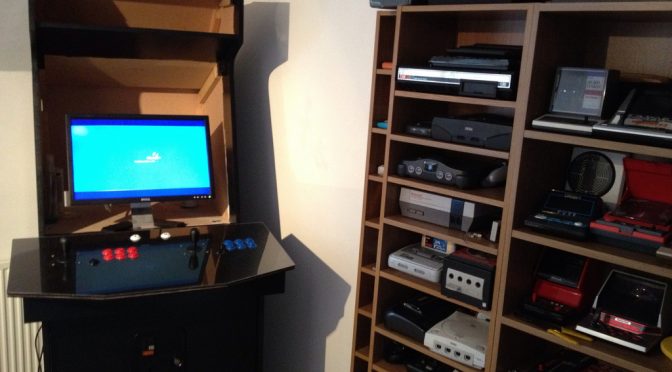
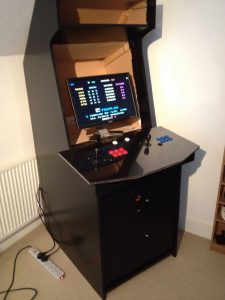
Assembled MAME Cabinet

The cabinet itself needed a bit of a rub down and final coat of paint, as it had been moved around a lot in the last few years.  I was pleased with the final paint finish, which was applied with a small sponge roller using plenty of paint, and looked just right – not too matt, not too shiny, and no brush strokes.

I fitted the recently completed front panel including coin doors using a piano hinge running down the left of the door, required due to the weight of the 16mm MDF.  With the panel in place, all of the major contruction work was now complete and I could take some time to admire my handiwork (and maybe have a few rounds on Snow Bros.).  I’m really pleased at how the cabinet has turned out, but realise I have few jobs to do before it is complete.


I’m also not convinced the monitor is big enough to really make the most of the space available, so I need to look into getting a bigger LCD monitor or TV, which is going to cost but I think will be worth it.

The other remaining jobs on my snagging list include:

Now I’ve got this far I suspect my next update is going to a lot sooner, the end is definitely in sight.

MAME cabinet project update

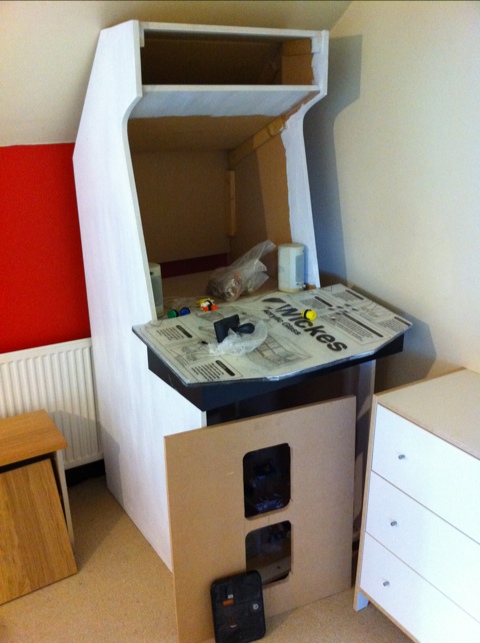
After dusting off my work in progress MAME cabinet, following a hiatus of about 6 years, I’m determined to get the job completed. After a quick parts inventory I found I actually had most of the bits and pieces I need lying around the house, so set to work.

Cabinet painting

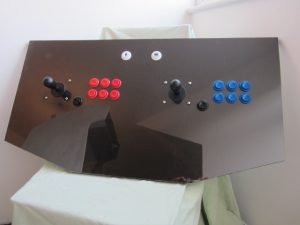
Mame Cabinet Control Panel
Finished Control Panel

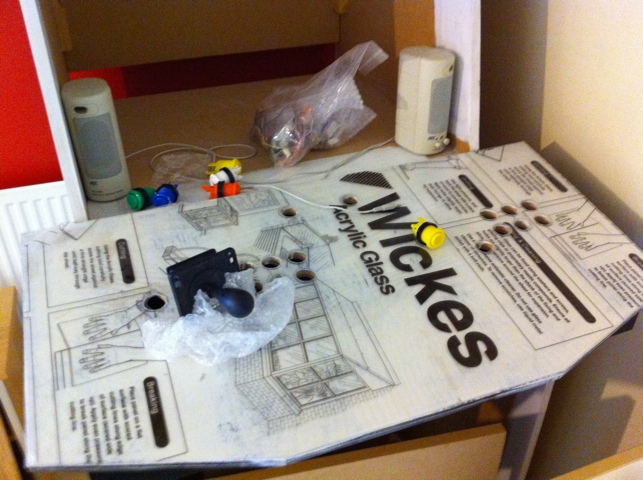
The cabinet itself was half primed, and so just need a quick rub down and the primer applied to the remaining bare MDF surfaces. I then applied the first coat of black latex-based paint that I had used for the control panel – you can see the effect after the first coat below. I used a small paint roller and applied a thin coat to ensure the finish was nice and even. I estimate 3 or 4 coats to do this properly, based on my experience with the control panel. It’s finally starting to look like a proper cabinet!

Control Panel Preparation

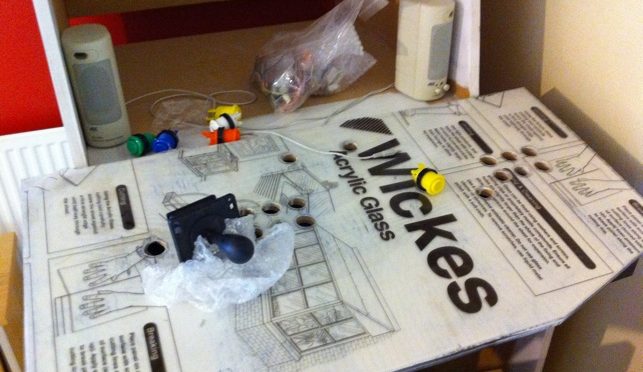
The control panel box had previously been primed and painted, and I had primed the control panel as well as drilling the cut-outs for the buttons and joysticks. The perspex overlay was also drilled, and so I only needed to paint the primed panel with black paint. This also took 4 coats to fully cover the white primer.

I had a mixture of Happ buttons from a kit I previously bought, but not enough of the right colours to complete the two colour red/blue look I wanted. I also needed some flat head bolts to hold the joysticks in place, so I ordered the components from Gremlin Solutions. I also took the opportunity to buy some plastic T-Molding to put around the panel and the exposed machine edges. I had already used a router to create the slot for the molding so this will just be pushed in place when the panel is complete.

On receiving the remaining items I started to assemble, using the buttons themselves to hold the already drilled perspex in place. At this stage I realised the holes were a bit snug, and the paint had reduced the diameter of the holes even further, so a Stanley blade was used to chip away the paint, MDF and perspex. Fortunately the rough edges were hidden by the ridge around each button, but next time I will make the holes slightly bigger! Drilling the holes for the joystick bolts was slightly nerve wracking, as I had to drill directly through the perspex, and a crack at this stage would write off the whole panel, but all went well. Slow and steady and not too much pressure, and the drill just sailed through the perspex layer. The flat bolts also do a great job of holding the perspex in place, without snagging on your hand when using the joysticks.

I’m really pleased with the look of the panel, the perspex gives it a professional looking finish, and the buttons and joysticks feel just right – particularly with the micro switches in place, which give just the right level of resistance.

Wiring the control panel

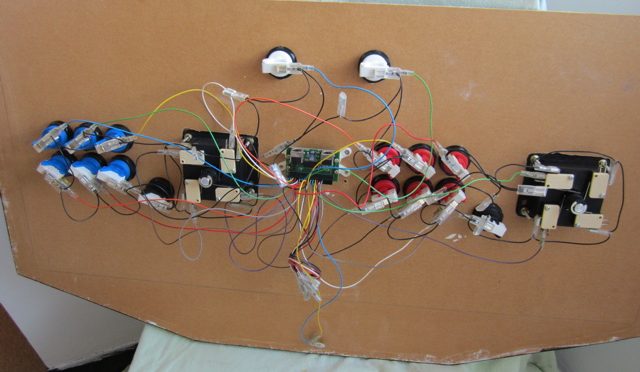
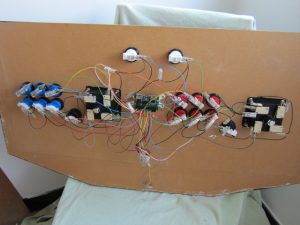
MAME cabinet Control Panel Wiring
Control Panel Wiring

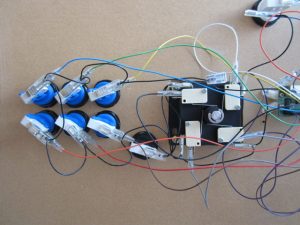
I already had an Ultimarc Minipac control panel interface, which I had previously bought on ebay as part of a kit. The Minipac came with a pre-wired harness, complete with spade connectors to link directly to the micro switches on each button and on the joysticks. Unfortunately my control panel layout was too big for the pre-wired harness, so some of the connections had to be extended using some additional wire acquired from Maplin. The black “common wire” which provides the power to each switch had some extra spade connections so I could stretch this to fit by just missing out a couple. All power to the PCB is through the keyboard interface to the PC, so no external power source is needed.

Although it looks complicated, the wiring process is relatively straightforward, as long as you take your time. It’s a bit if a birds nest at the moment but when I have tested the panel I will use cable ties to tidy up the harness.

Testing the MAME PC interface

With all the button and joystick switches connected, the panel was ready to test. I am using an old Dell Optimpex PC to run MAME, connected to a widescreen LCD monitor which I hope to mount on a swivel stand to allow horizontal and vertical display options without losing screen resolution. The PCB uses a PS2 type interface (the latest versions use USB connectors) so I had to buy a PS2 to PS2 cable on ebay. Powering on the PC, the PCB seemed to light up, but then the light went off. Using the setup software from Ultimarc, the PC did not seem to recognise the joystick movements or button presses, and a reboot did not help.

So I’m leaving this update on a slight cliffhanger (ooh the suspense), I think there may be a jumper missing from the PCB to tell it to

Close up of MAME control panel micro switches
Close up of micro switches

operate in PS2 mode, or it may be the Dell PC or Windows XP not recognising the PS2 connection. At least I have a great looking control panel, and worse case scenario I need to spend £30 on a new board with a USB link.

In my next update I’m hoping to have a working control panel, and finally have the MAME software running.

MAME cabinet project resurrected

In the late 90’s I got hooked on MAME, having found it to be a great way of playing old arcade titles that were no longer available in the flesh. Like many people who start out playing using a PC and keyboard, I soon longed for the feel of a real arcade cabinet. I wanted to play standing up, using a real arcade joystick and buttons to control the play.

So in 2003 my MAME cabinet project was born. After reading John St. Claire’s excellent guide, “Project Arcade”, I used the plans in the book to create my own MAME cabinet.

MAME Cabinet

After buying all of the components online and on ebay, I set about building a test rig to make see if I could get the joysticks and buttons communicating with the PC. Unfortunately the test rig was so much fun I ended up just using this to play MAME, which delayed construction of the cabinet! When I finally got around to building the cabinet, we had our second baby, and the project was put on hold.

20110909-125732.jpg

Fast forward to 2011 and 3 kids later, and I’m looking at dusting off the cabinet shell and resurrecting the build. Its in fairly good state, I have all of the components and even a donor PC. The original SONY TV that I had in mind for a monitor has been ditched for a spare LCD screen I have knocking about, which has the added bonus of being switchable from vertical format to horizontal format. This means I will not be restricted to playing one format of game, or playing in a postage stamp area of a larger screen.

20110909-125630.jpg

So I am hoping this is the first in a series of updates as I complete the MAME cabinet, and that after an 8 year hiatus I will finally get to playing my favourite arcade games on a real machine.