Tag Archives: Arcade

Galaga by Namco – Retro Arcade Review

At the time of writing, summer is here, and I am reminded of hot days spent in the arcades playing games like space shooter Galaga.  In the early 80’s my holidays would be spent camping with my family, and many of the campsites we visited would have a clubhouse and games room, and my pocket money would be spent indulging my habit on whatever cabinets were available.

galaga arcade konami screenshot
Galaga Arcade
In 1981 Galaga was the game of the summer for me, released by Namco as a successor to one of my previous favourites, Galaxians.  Having played the excellent space shooter Galaxians to excess I was keen to master it’s sequel – Galaxians’ diving aliens were a revelation to me after playing the more pedestrian Space Invaders, and I was sure that Galaga would be even better.

The first thing you notice on firing up Galaga is the graphics – big, colourful and incredibly fast, faster than anything that had come before it.  Rather than being presented with all of your enemies at the start of each wave, columns of aliens would fly in from the left and right, presenting an opportunity to take a few out before they fell into formation – if you could hit them.  Fortunately, unlike Space Invaders and Galaxians, your Galaga ship had the ability to fire multiple missiles, rather than waiting for each to hit home before you could launch the next, and this was absolutely necessary in Galaga due to the speed of the enemy ships.

Once the enemy ships were in formation they would begin to attack, and like Galaxian’s, small groups of attackers would break off and dive bomb your ship, requiring you to either avoid them and their missiles, or stand firm and destroy them for extra points.  Care was needed to avoid being trapped in a corner due to the angle of the dive, and also look out for the bigger ships which need 2 hits, although they do change colour after the first hit to remind you.

With each hit you are rewarded with a great sound effect, sounding like a kind of high pitched squelch, similar to the sound of pac-man eating a pill.  With the speed of Galaga, the sound created was a constant chattering and chirping that was an audible reminder of the success of each shot.

Beam me Up

At certain points, the large green and blue “boss” aliens at the top of the formation would dive, and half way down the screen fire a tractor beam towards the player.  You have 2 options here, either destroy the boss before he grabs your ship, or allow yourself to be “beamed up” by the alien and lose a life.  At this point your ship is returned to the formation, and will begin to attack your remaining vessels along with it’s wingmen.  If however you can destroy the wingmen of your captured ship, it will be returned to you giving you a “double ship” with twice the width but also twice the firepower.  This extra firepower comes in handy from stage 3 onwards…

Galaga Bonus Stage

[amazon asin=B004UJLNMQ&template=iframe image]Starting at level 3 (and every 4th stage after) you will be presented with a bonus round, where the Galaga ships would fly onto the screen and off again, following erratic flight formations, whilst you try to shoot them all down.  The trick with the bonus level is to find the point on the screen through which all the aliens must travel repeatedly, and at the slowest point of their flight, in order to maximise your chance of hitting all of them.

After 5 waves, each having 8 enemies, you are given a bonus score based on the number of ships you manage to take out, with 40 (obviously) being a perfect score. Hitting all the enemy ships see you rewarded with a special bonus of 10,000 points.  It is possible to score a perfect 40 without a twin ship, but it makes it a lot easier so is highly recommended.

There is a bug in the system that means that only player 2 can score more than 999,990 points, as player 1 is limited to 6 characters for the score.  You’d better get a screenshot though, as only the first 6 digits will display on the high score screen regardless of player number.

Trivia

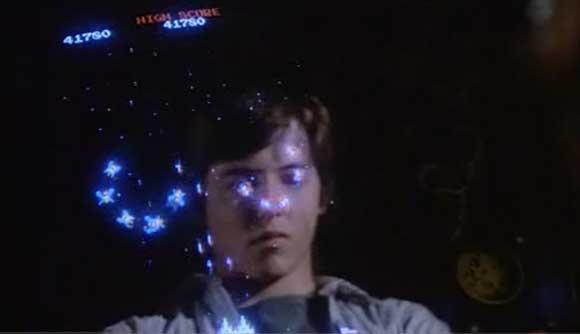
Matthew Broderick playing Galaga in War Games
Galaga in the movie “War Games”

The Galaga game appeared in the movie War Games starring Matthew Broderick, as one of the “latest games” his character downloads from the hacked servers of the an un-named computer company.
At the time I thought this was a fantastic idea, and wanted to make me build my own computer to play arcade games, it’s only 30 years later that I actually managed it with my MAME project.
Looking back the idea of downloading a game from a remote computer to play at home was like witchcraft, whereas 30 years later you can do it on your mobile phone. Back then Matthew Broderick needed his own computer and a dial-up modem with an acoustic coupler, all very exotic stuff.

Home versions

Galaga Konami NES version screenshot
Galaga NES Version

Galaga was released on number of home consoles and computers, the most notable being the Atari 7800 and NES versions, as well as a later port to the Gameboy, where it was bundled with Galaxians.  Modern consoles can access Galaga through the Namco Museum compilations, and it has also had the iPhone treatment as part of Galaga 30th Anniversary Collection,  which is available as a free download from the iTunes store.

Of all the home versions I would have to go with the NES release as being the most faithful.  Despite playing all of the recent conversions and compilations I can’t recreate the feeling of playing Galaga on an upright machine, so when I am in need of a fix I will head back to my MAME cabinet, which takes me all the way back to the summer of 1981.

Snow Bros. Nick and Tom Retro Arcade Review

There are some games which I hesitate to write about, as they are so good I just don’t feel I will do justice to them, and I put them off to another day. On this list would be the original Star Wars arcade game, as well as the classic Track & Field, neither of which I am quite ready to tackle. Snow Bros may not be as well known as these games, but until now it was also on my list.

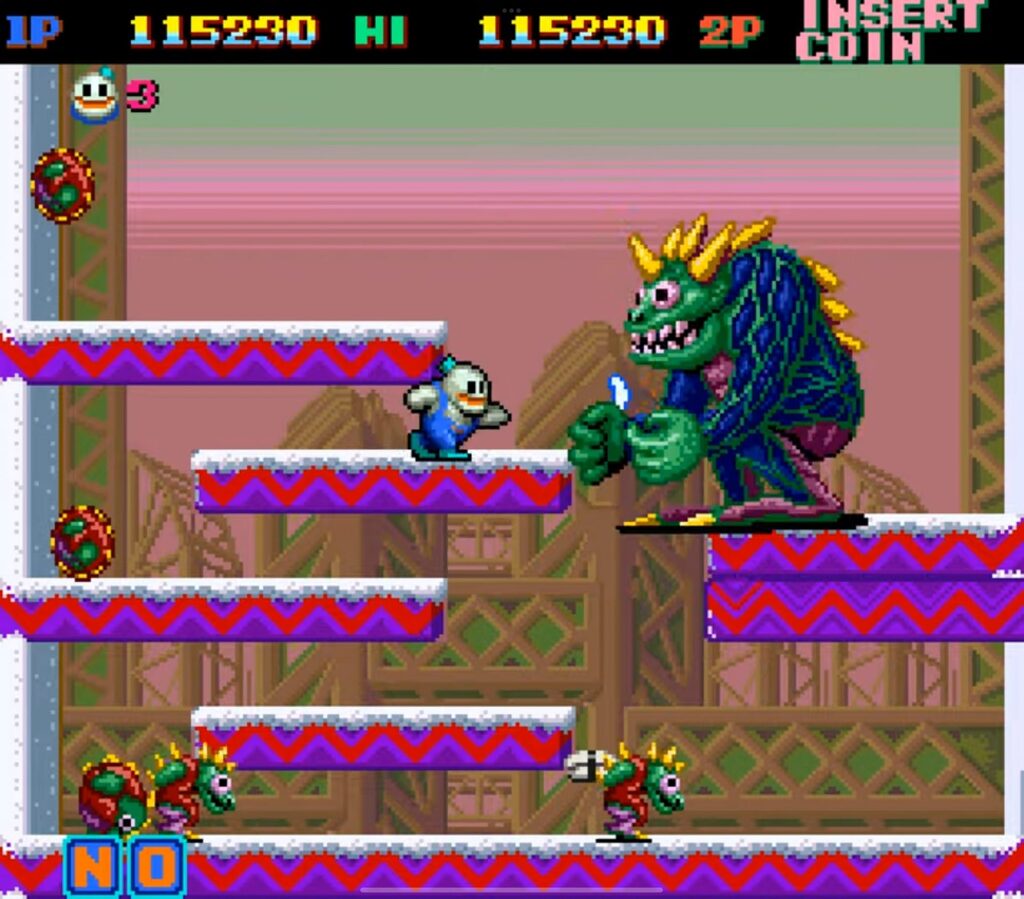
Snow Bros. Arcade Screenshot
Snow Bros. was released by Toaplan in 1990, whilst I was at University, and my first experience was playing in the basement of the Student Union. My first thought was that the game was very similar to Bubble Bobble, with the bubbles being replaced with snowballs. My second thought was that I may have to ditch my afternoon lecture on microprocessors to play this game, it was that good. 20 years later and I am still playing Snow Bros, now on my recently completed MAME cabinet, and a recent late night game session prompted me to finally write this retro review.

Snow Bros Arcade Marquee

Snow Bros is a platform game starring two brothers, Nick and Tom, whose mission is to rid the world of monsters, using the power of snow. Each level, which features different platform and monster combinations, requires you to destroy all of the enemies in order to progress to the next. Your Snow Brother achieves this by throwing snow at the monsters until they turn into snowballs, incapacitating them for a period of time. Kick the snowball, and it bounces around the screen and destroys the monster when it reaches the bottom, as well as killing any other monsters it encounters along the way.

The trick with Snow Bros is to turn as many monsters into snowballs as you can, without kicking them, and then kick one at the top of the screen to destroy all of the monsters on the way down. This generates a big bonus, in the form of currency which drop from the top of the screen and need to be collected quickly before the level ends.

There are various monsters to be found as you progress, each with different characteristics, requiring different approaches to destroy:

  • Red monsters can move around the screen in the same way as the Snow Bros, and can only kill you by touching you
  • Yellow monsters can run on all fours and move quicker than Red Monsters, killing you on contact
  • Green monsters move slowly but breath fire, which can kill you from long distances
  • Blue monsters spin like mini-tornados, and can move through platforms and attack you directly

Take too long to clear the screen, and you will be attacked by an invincible pumpkin-head monster, which can only be slowed down with snow, not destroyed.

Destroying monsters gives you bonuses which come in two forms, either a piece of sushi for extra points, or a bonus potion that will give you extra powers, including faster movement, big snowballs and increased throwing range. A green bottle provides a special bonus, where your snow brother inflates like a balloon and whizzes around the screen killing everything he comes into contact with.

At the end of every 10 levels, which in classic Donkey Kong style, progress upwards, you will encounter a boss. These boss levels provide a break from the platform levels, and take some time to work out. There are 5 bosses to be beaten across the 50 levels in the game, including a giant lizard, a big pink head, and a pair of yellow birds, who can be destroyed by turning their weapons back on them. Each boss will have a different projectile to throw at you, and by turning these into snowballs, they can be kicked at the boss to cause damage, indicated by a health bar at the top of the screen.

Like many classic platformers, there are multiple ways to complete Snow Bros, and developing the optimum approach for each screen is part of the challenge if you want to progress to latter stages. Even then, this game is going to take some beating, with later levels a veritable minefield of enemies approaching you from all angles.

Home Conversions

Snow Bros for the Megadrive

Few home conversions were made for this game, but there were good versions produced for the NES and the Sega Megadrive (Genesis), with the Sega version being the most authentic. There was also a version for the Gameboy that is worth a play.

Returning to the game now, I instinctively repeat the tactics learned on and off over twenty years, almost on auto-pilot, until I get to level 20 and above, when all tactics go out of the window and I switch to survival mode.

Snow Bros. may have caused me to miss a few university lectures, possibly cost me a grade or two, but it was worth it.

MAME Cabinet Project Update – It’s Alive!

It’s been a few months since my last upate, after picking up this project in November 2011. In the last update I was assessed the state of the machine components I had been collecting and revisited the half-finished cabinet. I’m on the home straight, with much of the major construction work done already, I now need to assemble all of the elements of the MAME machine.

Rebuilding the Control Panel

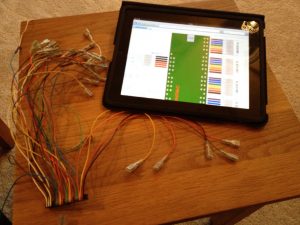
Rewiring the loom for the Minipac encoder

I thought that my control panel was complete after the last update, but after plugging into the Dell desktop I am using to host the MAME software, I found that the keyboard encoder was no longer working.  This model used the old style PS2 keyboard interface, and I think the Dell was struggling with it under Windows XP, so I took the decision to replace with a new “Minipac” encoder from Ultimarc with a USB connector.

Unfortunately this required a different wiring loom to the one I had installed, requiring a trip to Maplins for a new PCB connector and a comprehensive rewire.  In hindsight I probably should have replace the whole wiring loom as well, but I did get a cetain satisfaction from completing the rewire.

 Attaching Control Panel to the Cabinet

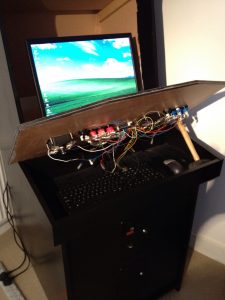
MAME Cabinet with Control Panel Lifted

With my shiny new Minipac in place, and the wiring complete, it was time to attach the control panel to the main cabinet.  I had previous created a box to fit beneath the control panel to allow for easy access to the controls for maintenance, and also to store the keyboard and mouse which are needed (at least until I fit a decent MAME front end software) to operate the PC.  I had cut a large hole in the back of the box which allowed the cables for the Minipac, the keyboard and the mouse to feed down to the PC in the main cabinet.

All seemed to fit together well, but I realised I still need to fit some kind of latch to hold the panel open for when I need to work on it (a hammer does just fine for now). I also need to fit the T-Moudling along the edge of the control panel, which I can do later as I have already routed the groove needed to hold the moulding in place. I haven’t routed the edge of the cabinet yet, which I may come to regret later as this is a messy job, but that’s a problem for another day.

Install MAME Software and Test

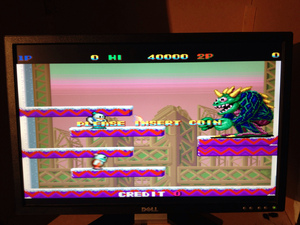
MAME working! Screenshot is of Snow Bros

Before I could test with MAME, I needed to program the control panel to make sure all the buttons were mapped to the keyboard inputs correctly.  Ultimarc provide a really good utility for this, and it’s also a good way of testing that all of the wiring to the Minipac has been effective.   After mapping to my specific panel, and addressing some loose wires, the controls seemed to be working and registering key presses and joystick movements.

I had not downloaded the MAME software on this PC yet, so I needed to access the latest version from the MAME website.  Not only did this give me a chance to try out the keyboard and mouse in place under the control panel, but also the cheap wireless card I had fitted to the PC, to save messing about with transferring files manually.

I soon had the MAME software working, and located a couple of ROMs to test the interface, starting with Phoenix (my all time favourite arcade game) and Snow Bros.  After a bit of fiddling around under the keyboard to enter a credit (I don’t have the coin door working yet) I was ready to go!

After waiting so long (remember I started this project back in 2004) it was great to finally be using the cabinet, and it felt fantastic. The height and positioning of the controls seem perfect, and the feel of the joystick and buttons 100% authentic. At this stage it would be very tempting to just load up my favourite ROMs and start playing, but I have a few more jobs to do now and a renewed enthusiasm to complete the build.

Building the Coin Door

MAME Coin Door
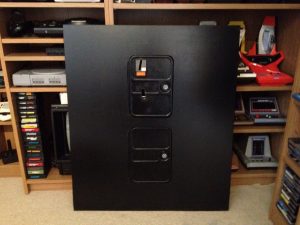
Front Panel with Coin Doors in Place

I had previously purchased a pair of coin doors from eBay, so these just needed to be tidied up with a bit of sandpaper, and some Hammerite added in places to address a bit of corrosion.  The doors would be permanently embedded in the front panel, but not designed to open as I would be putting the whole of the front panel on a hinge to enable access to the machine’s interior.

After drawing around the front panel, I just had to cut out the wholes with a jigsaw, and prime and paint the panel with  black latex paint.  The doors were then attached along the original door hinges and locked closed in the panel.  The doors look great and add a huge amount of authenticity to the otherwise plain machine, and I would recommend to anyone looking to undertake a MAME cabinet build.

Final Assembly

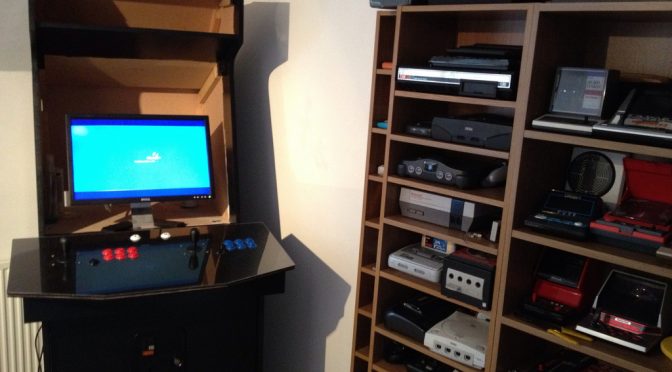
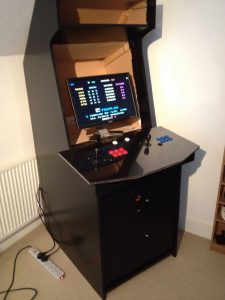
Assembled MAME Cabinet

The cabinet itself needed a bit of a rub down and final coat of paint, as it had been moved around a lot in the last few years.  I was pleased with the final paint finish, which was applied with a small sponge roller using plenty of paint, and looked just right – not too matt, not too shiny, and no brush strokes.

I fitted the recently completed front panel including coin doors using a piano hinge running down the left of the door, required due to the weight of the 16mm MDF.  With the panel in place, all of the major contruction work was now complete and I could take some time to admire my handiwork (and maybe have a few rounds on Snow Bros.).  I’m really pleased at how the cabinet has turned out, but realise I have few jobs to do before it is complete.


I’m also not convinced the monitor is big enough to really make the most of the space available, so I need to look into getting a bigger LCD monitor or TV, which is going to cost but I think will be worth it.

The other remaining jobs on my snagging list include:

Now I’ve got this far I suspect my next update is going to a lot sooner, the end is definitely in sight.

Yie Ar Kung Fu for the ZX Spectrum

Yie Ar Kung Fu started life as an arcade game released by Konami in 1985, having features that were seen for the first time in a fighting game, including multiple opponents, a health bar and multiple special moves. This really was the birth of a genre which has spawned 100’s of one on one fighters, including series such as Street Fighter, Tekken and Soul Caliber.

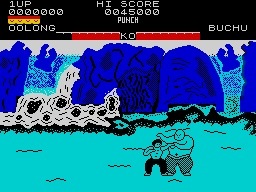
Yie Ar Kung Fu ZX Spectrum
The Yie Ar Kung Fu game on the Spectrum was a faithful rendition of the original game, and featured a martial arts master, Oolong, whose mission was to fight through a series of bouts against increasingly difficult competitors. Moves were achieved through the joystick and a punch and kick buttons, and included jumping attacks. With practise you could pull off moves such as leg sweeps and roundhouses, which were needed to defeat each of your opponents different fighting styles. Whilst not the first game to feature hand to hand combat, earlier games such as Kung Fu Master had a very limited move set, with basic punch and kick moves. The Spectrum version of Yie Ar Kung Fu managed to replicate all 16 special moves from the original arcade game, providing a great variety in the approach to defeating each opponent. This did however mean that playing on the keyboard required use of 9 different keys, and so a joystick really was the preferred option.


This video is the enhanced 128k version with fancy fonts and improved music and effects

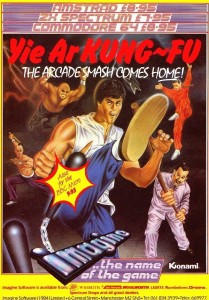
Yie Ar Kung Fu advert

The winner is the first to 10 points (or hits) in a single bout, each hit reducing the opponents life bar, a feature that carried across to pretty much every fighting game that followed. Each of your 10 different opponents had unique moves and attacks, some armed with weapons such as swords, nunchaku, chains and throwing stars. A different strategy was required for each, dodging attacks and timing your strikes at a moment of weakness.

The graphics of the Spectrum version of Yie Ar Kung Fu were detailed, if a little less colourful than on other conversions, mainly due to the Spectrum’s attribute clash issues. But this didn’t stop it from being a great game, and remembered fondly by many Spectrum owners.

Along with “Way of the Exploding Fist”, this game represents the height of fighters on the Spectrum (a machine not ideally suited to the genre) and is memorable for being my first experience of a proper fighting game.

Strider Arcade Retro Review

Strider Hiryu – Capcom’s Arcade Hero

My first introduction to Capcom’s Strider was not through the arcade cabinet, but the excellent Megadrive port, which was like nothing I had seen before, with it’s huge sprites and fantastically varied levels and incredible bosses – it was an arcade revelation.  At it’s heart, Strider is a side scrolling beat-em-up, but that simple description does the game a huge injustice.

Strider - mechanical monkey
One of the more impressive bosses
Set in a futuristic world, your “Strider” Hiryu must leap and slash his way through 5 levels in order to defeat the evil Meio, whose army has taken control of several European states.  The mission begins with Hiryu flying in on his hang-glider, before he leaps into action in the first level, a Russia themed location.  The first thing that grabs you is the size of the characters and the detailed animation, with Hiryu able to leap directly upwards, or cartwheel left of right.  He can also grip onto platforms above him, grappling across chasms, and perform a sliding tackle move.  His main weapon is a light sabre that is used to perform rapid slash movements to dispatch enemies.

To help Strider Hiryu on his way, various power-ups can be obtained including wingmen in the form of a small robot, a big metallic cat and a mechanical hawk, each of which feature their own special moves and animations.

Stride Arcade Hill Section
Strider Arcade – Hill Section

The five levels include the Russian location, snowy Siberia, a flying warship, the jungle of the Amazon and finally Meio’s Moonbase.  Each level is distinctly different in terms of the format, the enemies and tactics required to complete, and within each level there are mini-bosses, as well as end of level bosses, depicted using hugely detailed sprites.  Stand out bosses include a terminator-style mechanical gorilla with a huge reach, and a looping snake monster that needs to be beaten by jumping on it back.

Strider Megadrive / Genesis Console Conversion

One thing you realise very quickly is that it is HARD.  Strider only has 5 levels, but to see all of them will have cost you a few 10p pieces back in the arcade, as death was frequent and certain points in the game were very tough to navigate.  Thankfully the Megadrive port was incredibly faithful to the arcade orginal, and allowed you to perfect your technique without costing you a fortune. In fact the console conversion was so good it made it into my list of Top 10 Megadrive / Genesis Games.If you haven’t had the chance to play Strider, I recommend this is the best way of sampling one of CAPCOM’s finest games and a real retro classic that represents the pinnacle of 2D arcade gaming.

Strider 3 – the Return of Strider Hiryu on PS4 and Xbox One

Due to the popularity of the original Strider games, the series received a reboot in 2014, entitled simply Strider, but for the purposes of this article I’d call it Strider 3. The game was launched for the latest XBOX One and Playstation 4 platforms, as well as the last generation XBOX and PS3, and followed the original Strider story, as Hiryu battles against the evil Grandmaster Meio.

I’ve yet to play this version, but it’s on my growing list, and it will be interesting to compare this version of the Strider universe with the fantastic arcade original.

Thanks to The Games Shed for recording this video specially for me, please pay the shed a visit at www.thegamesshed.co.uk.

Missile Command Retro arcade review

In the early 80’s we were at the height of the nuclear arms race, and the Doomsday clock representing our proximity to a nuclear war between the west and the Soviet Union was at 11:57. Released at the start of the escalation in 1980, Missile Command was a game that came to symbolise that arms race, painting a bleak picture of our chances should the war ever happen.

Missile Command Arcade by Atari
Missile Command by Atari

Charged with control of three anti-missile bunkers, your mission was to defend 6 cities at the bottom of the screen from attack by missiles raining down from the top. This classic arcade game from Atari was one of the first to feature a trackball, a kind of large upside-down mouse wheel, as opposed to the usual joystick control.

You had 3 missile bases from which to launch counter-measures, which destroyed the missiles in mid flight before they could hit your cities, with each missile base having it’s own fire button.

The cursor on the screen controlled where your counter measure would strike, and you had to time firing to ensure the explosion caught the incoming missile in it’s halo.

Careful tactics were required to prevent using up your limited supply of ammo, so timing a shot to take out more than one missile was key to getting to the higher levels of the game. You could also allow a missile to strike a destroyed city and conserve your arsenal.

Destroying all missiles in a wave and keeping at least one city alive would allow you to progress to the next, faster wave. There was no end to the game, just ever faster and more agressive missile attacks, resulting in some frantic trackball spinning.


One of those simple but maddeningly addictive games, it was transferred to home consoles but never quite the same without the speed and accuracy of the trackball.  One of the most successful conversions, despite the blocky graphics and lack of a trackball was the Atari 2600 conversion, which was remarkably playable and captured the essence of the original.  It also featured some great box art, with evocative images of the missile launch control.

More recently the game has been recreated for iPad and iPhone as part of Atari’s Greatest Hits, but is spoiled by the touch screen controls, and only really playable using a bluetooth controller (see my review of the iCade controller).

A great game that sadly is no longer playable in its original form as most working cabinets are now in the hands of private collectors, and finding one in an arcade is very unlikely, at least in the UK.